Automations: Email Forwarding
Get a dedicated email address for a project so any PDF attached to an email is automatically ingested and processed.
Last updated
Email forwarding gives you a dedicated @files.docuclipper.com address tied to a specific project and document type. When you (or a vendor, client, or colleague) send a document to that address, DocuClipper picks up the attachment, starts a job automatically, and the results appear in the project. No manual upload needed.
This is the fastest way to handle invoices or receipts that vendors email you directly.
Setting up email forwarding
- In the left sidebar, open Automations.
- Use Select folder & project (or Change project) to pick the folder and project where the documents should land. Automations are configured per project.
- In the Input sources card, click Add input.
- In the Add input source window, choose the Email forwarding card.
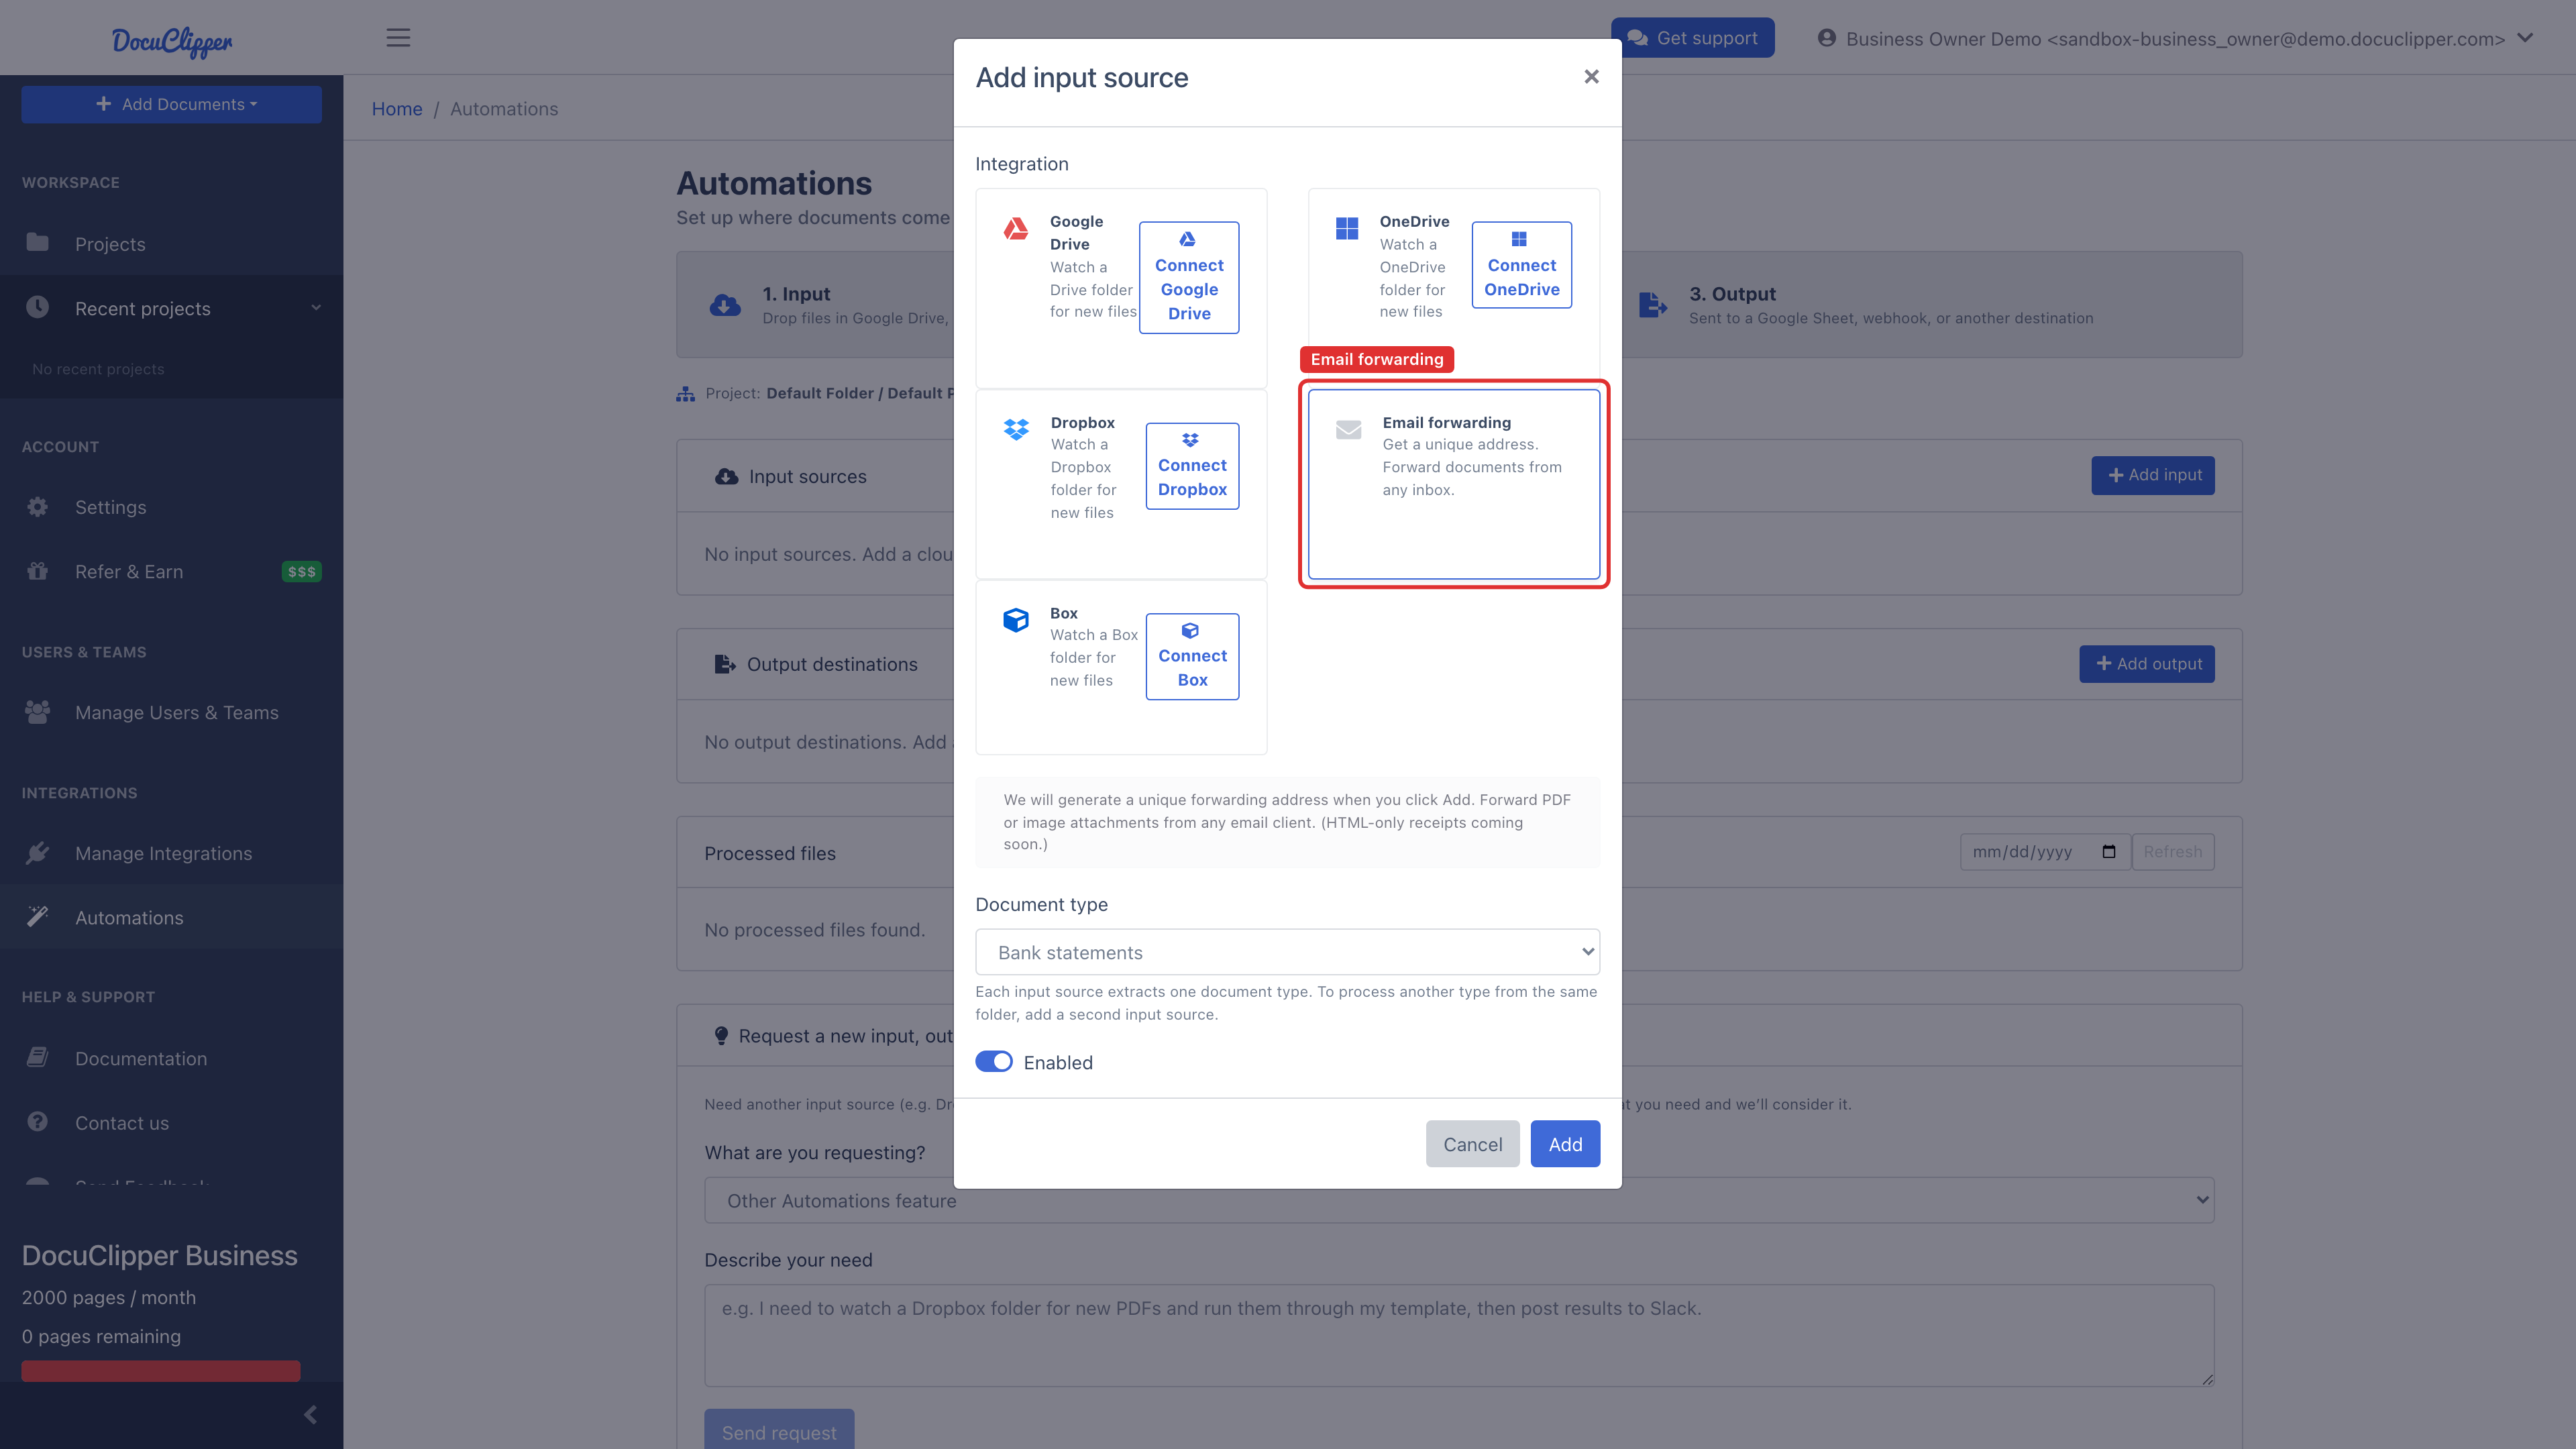
-
Pick the Document type you want DocuClipper to extract (for example, Invoices), leave Enabled on, and click Add.
-
DocuClipper generates a unique address such as:
invoice-acme-42-a3f7x8@files.docuclipper.com -
Click Copy to copy the address to your clipboard. You can also click Send test to email a document to it right away.
-
Add that address to your email client as a forwarding rule, or give it to vendors as a dedicated inbox for their invoices.
How it works
- Any email sent to the address is fetched by DocuClipper.
- PDF and image attachments are extracted and a job is created in the project, exactly as if you had uploaded the file manually.
- If an email has no supported attachment, DocuClipper falls back to extracting the email body (useful for receipts sent as inline HTML).
- Attachment types other than PDF and image are skipped.
One address per project and document type
Each forwarding address is unique to the project + document type combination. If you need separate inboxes for invoices and bank statements, add a second Email forwarding input source with the other document type in the same project.
Sharing the address
You can share the forwarding address with anyone who should be able to submit documents to the project (vendors, clients, or team members). There is no authentication on the sending side; anyone who knows the address can trigger an ingest.
Keep the address private if you want to control who can submit documents.
Troubleshooting
- Job not created after sending an email: allow a minute or two for delivery and processing. Check the project's recent jobs list for the new job.
- Attachment not processed: DocuClipper processes PDF and image attachments. Other file types (spreadsheets, ZIPs, etc.) are skipped.
- Lost the email address: open Automations, select the project, and find the email input in the Input sources table — the address is listed there with a copy button.