
Creating and Using Custom Templates
Extract any recurring layout — an unsupported bank statement or any other document — with Automatic Conversion or a custom template you draw or describe in plain English, then reuse it on every future file.
Last updated
DocuClipper has dedicated, tuned extractors for the common document types. For anything else — an unsupported bank statement, a rent roll, a trust statement, an ACORD form, a client memo — you have two options: Automatic Conversion for a quick one-off result, or a custom template you build once and reuse on every future document in the same layout.
When to use this
Use a custom template for any recurring PDF whose layout doesn't change from document to document:
- A bank or credit card statement DocuClipper doesn't yet recognize.
- Trust-account or custodial statements in a non-standard format.
- Rent rolls, leases, or other property documents.
- Legal forms, tax letters, ACORD forms, packing slips, or client-specific memos.
If your document is a supported type, use its dedicated extractor instead — those flows are tuned per document type and produce more accurate results than the custom-template flow:
| Document type | Where to go |
|---|---|
| Bank or credit card statement | Add Documents → Bank/CC Statements (PDF) |
| Invoices, receipts, or POs | Add Documents → Invoices, Receipts & POs |
| Check images | Add Documents → Check Images |
| Brokerage statements | Add Documents → Brokerage Statements (PDF) |
| W-2, 1099, paystubs | Add Documents → Forms (W-2, 1099, Paystubs) |
Automatic Conversion vs. a custom template
Both start from Add Documents → Other Documents.
- Automatic Conversion is best for an unsupported document whose data is already laid out in clean columns and you just need it once. It converts the whole file and lets you adjust the columns afterward. It exports to Excel only — QuickBooks and other third-party formats aren't supported.
- A custom template gives you full control over exactly which fields are pulled and how, and — because it's saved — reuses those definitions on every future document in the same layout.
Automatic Conversion
- Click Add Documents in the left sidebar and choose Other Documents.
- Select Automatic Conversion and upload your files.
- After conversion, review the Summary Table and adjust columns if needed.
- Click Download File.
Creating a custom template
Templates are built in the custom-document editor.
- Click Add Documents in the left sidebar.
- Choose Other Documents.
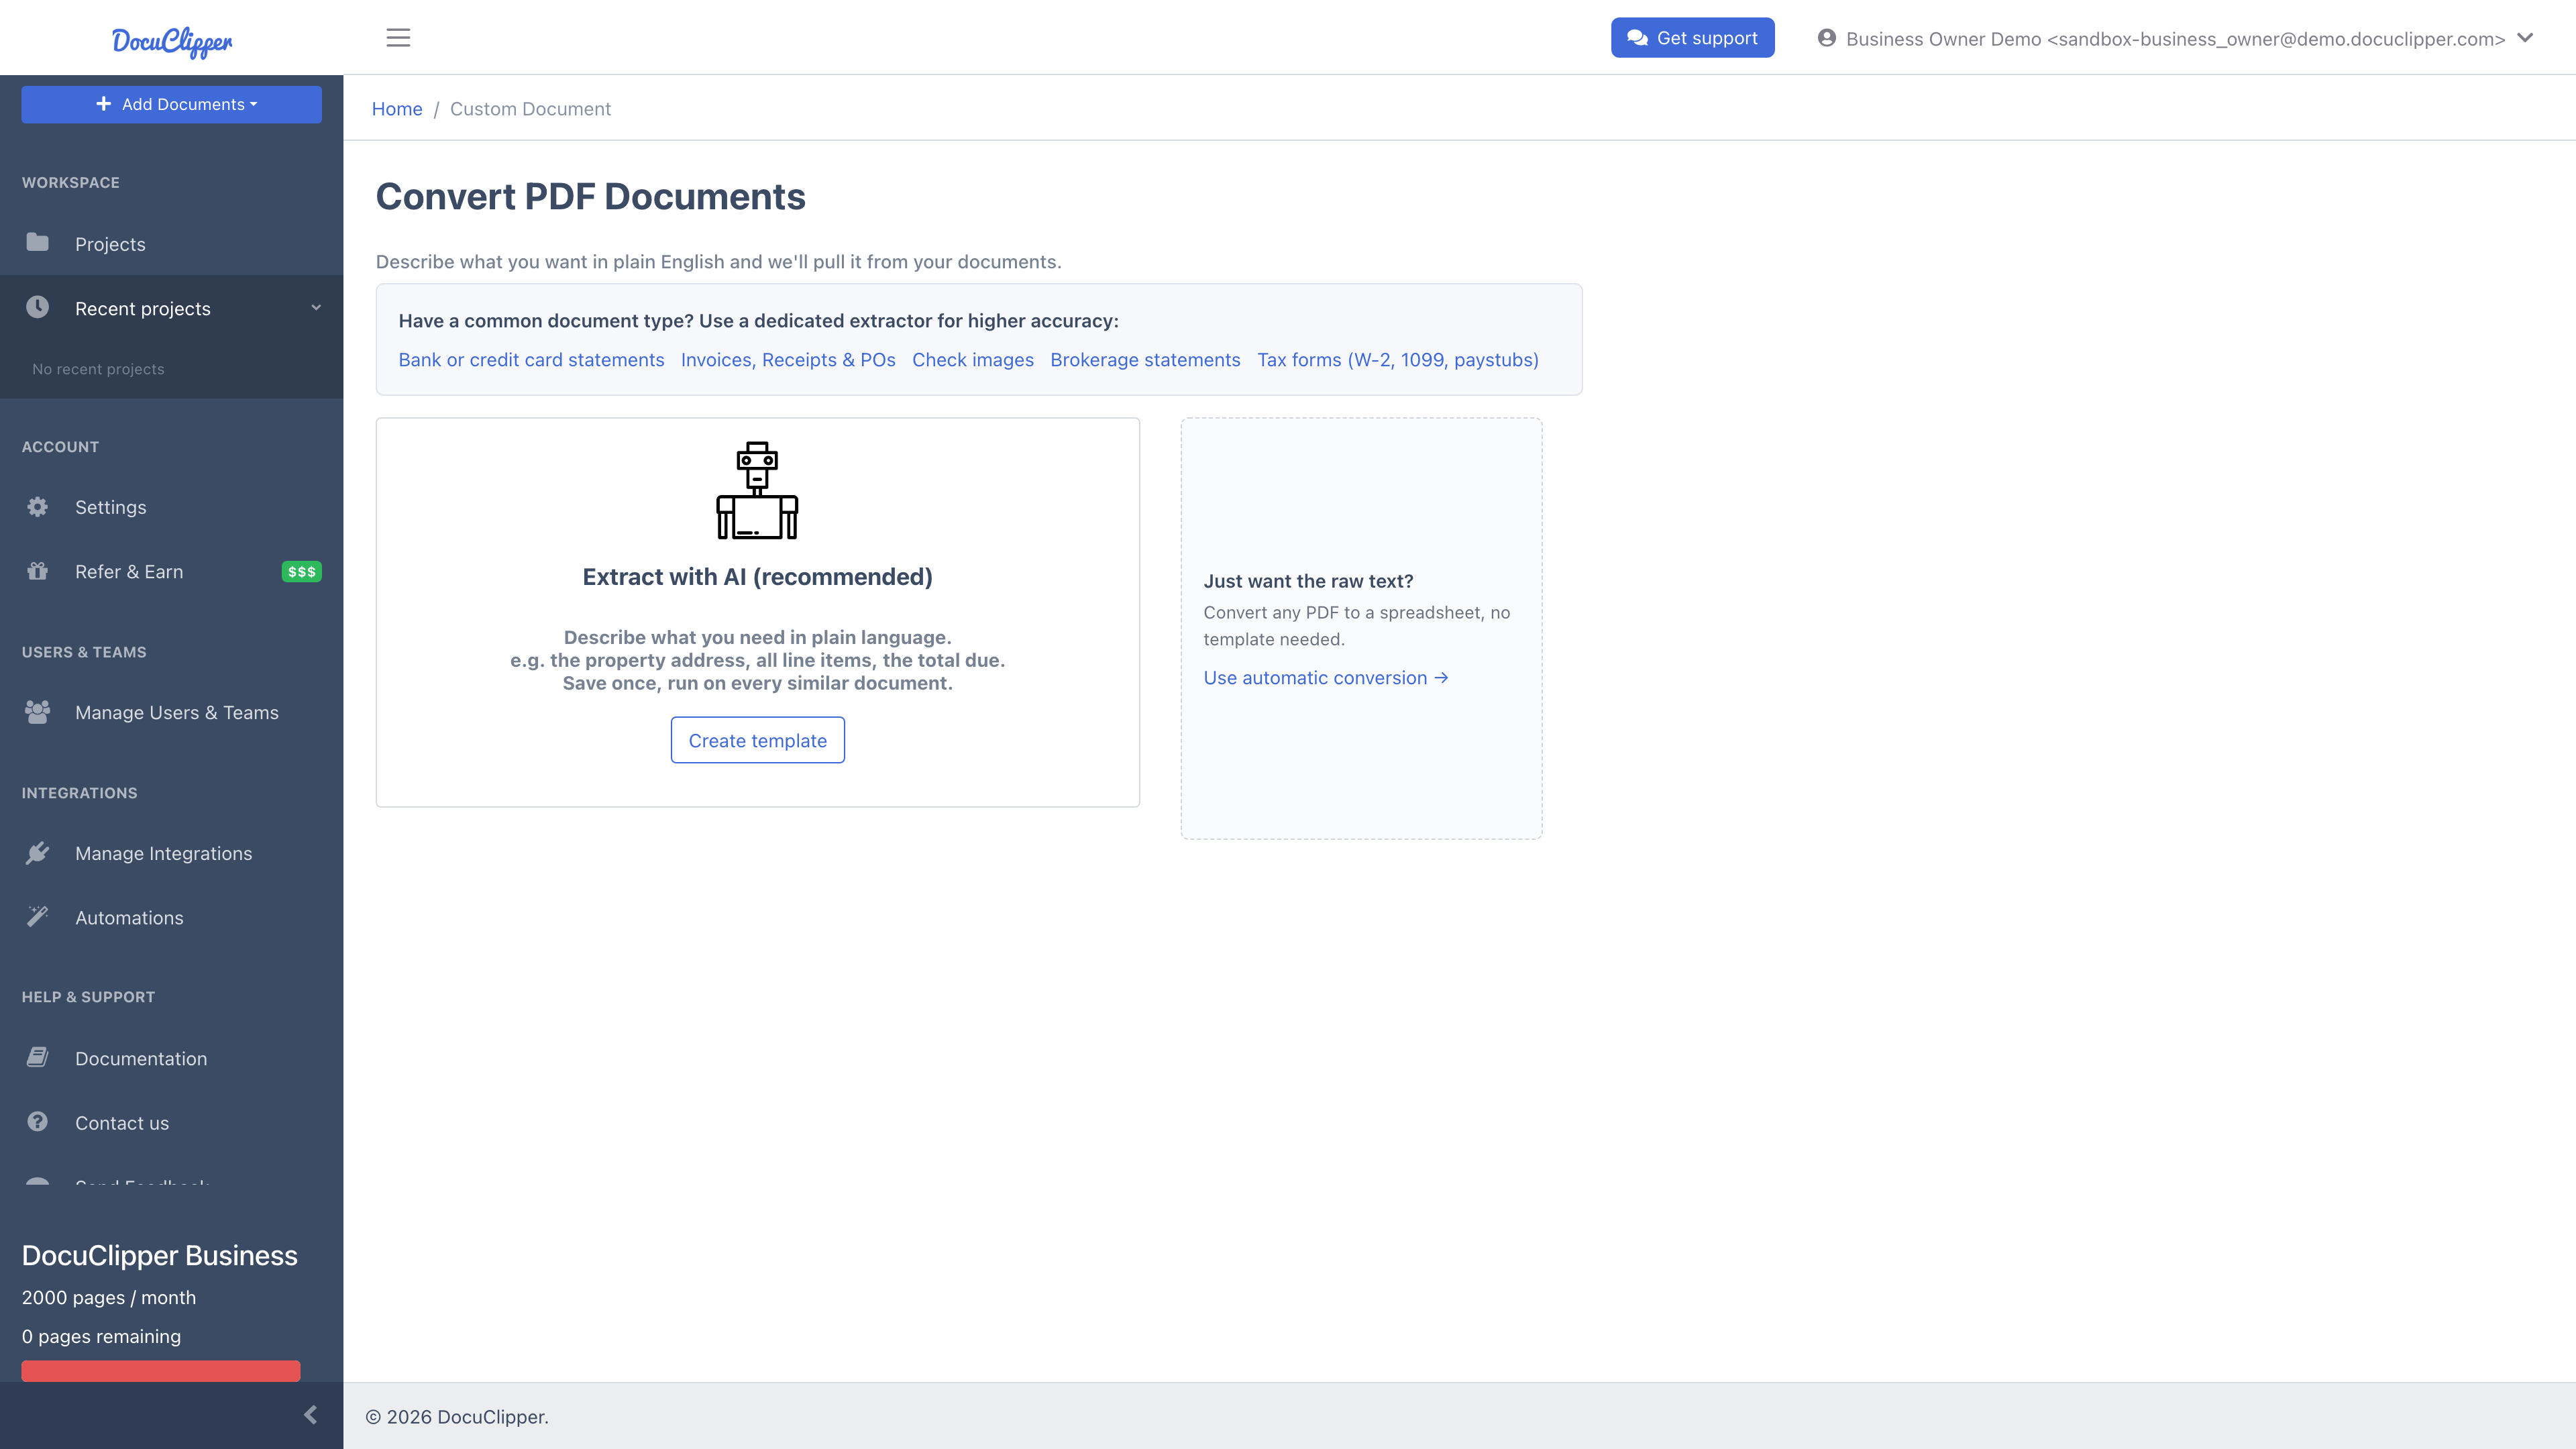
- On the Convert PDF Documents page, pick Extract with AI (recommended).
- Upload one sample PDF in the layout you want to save.
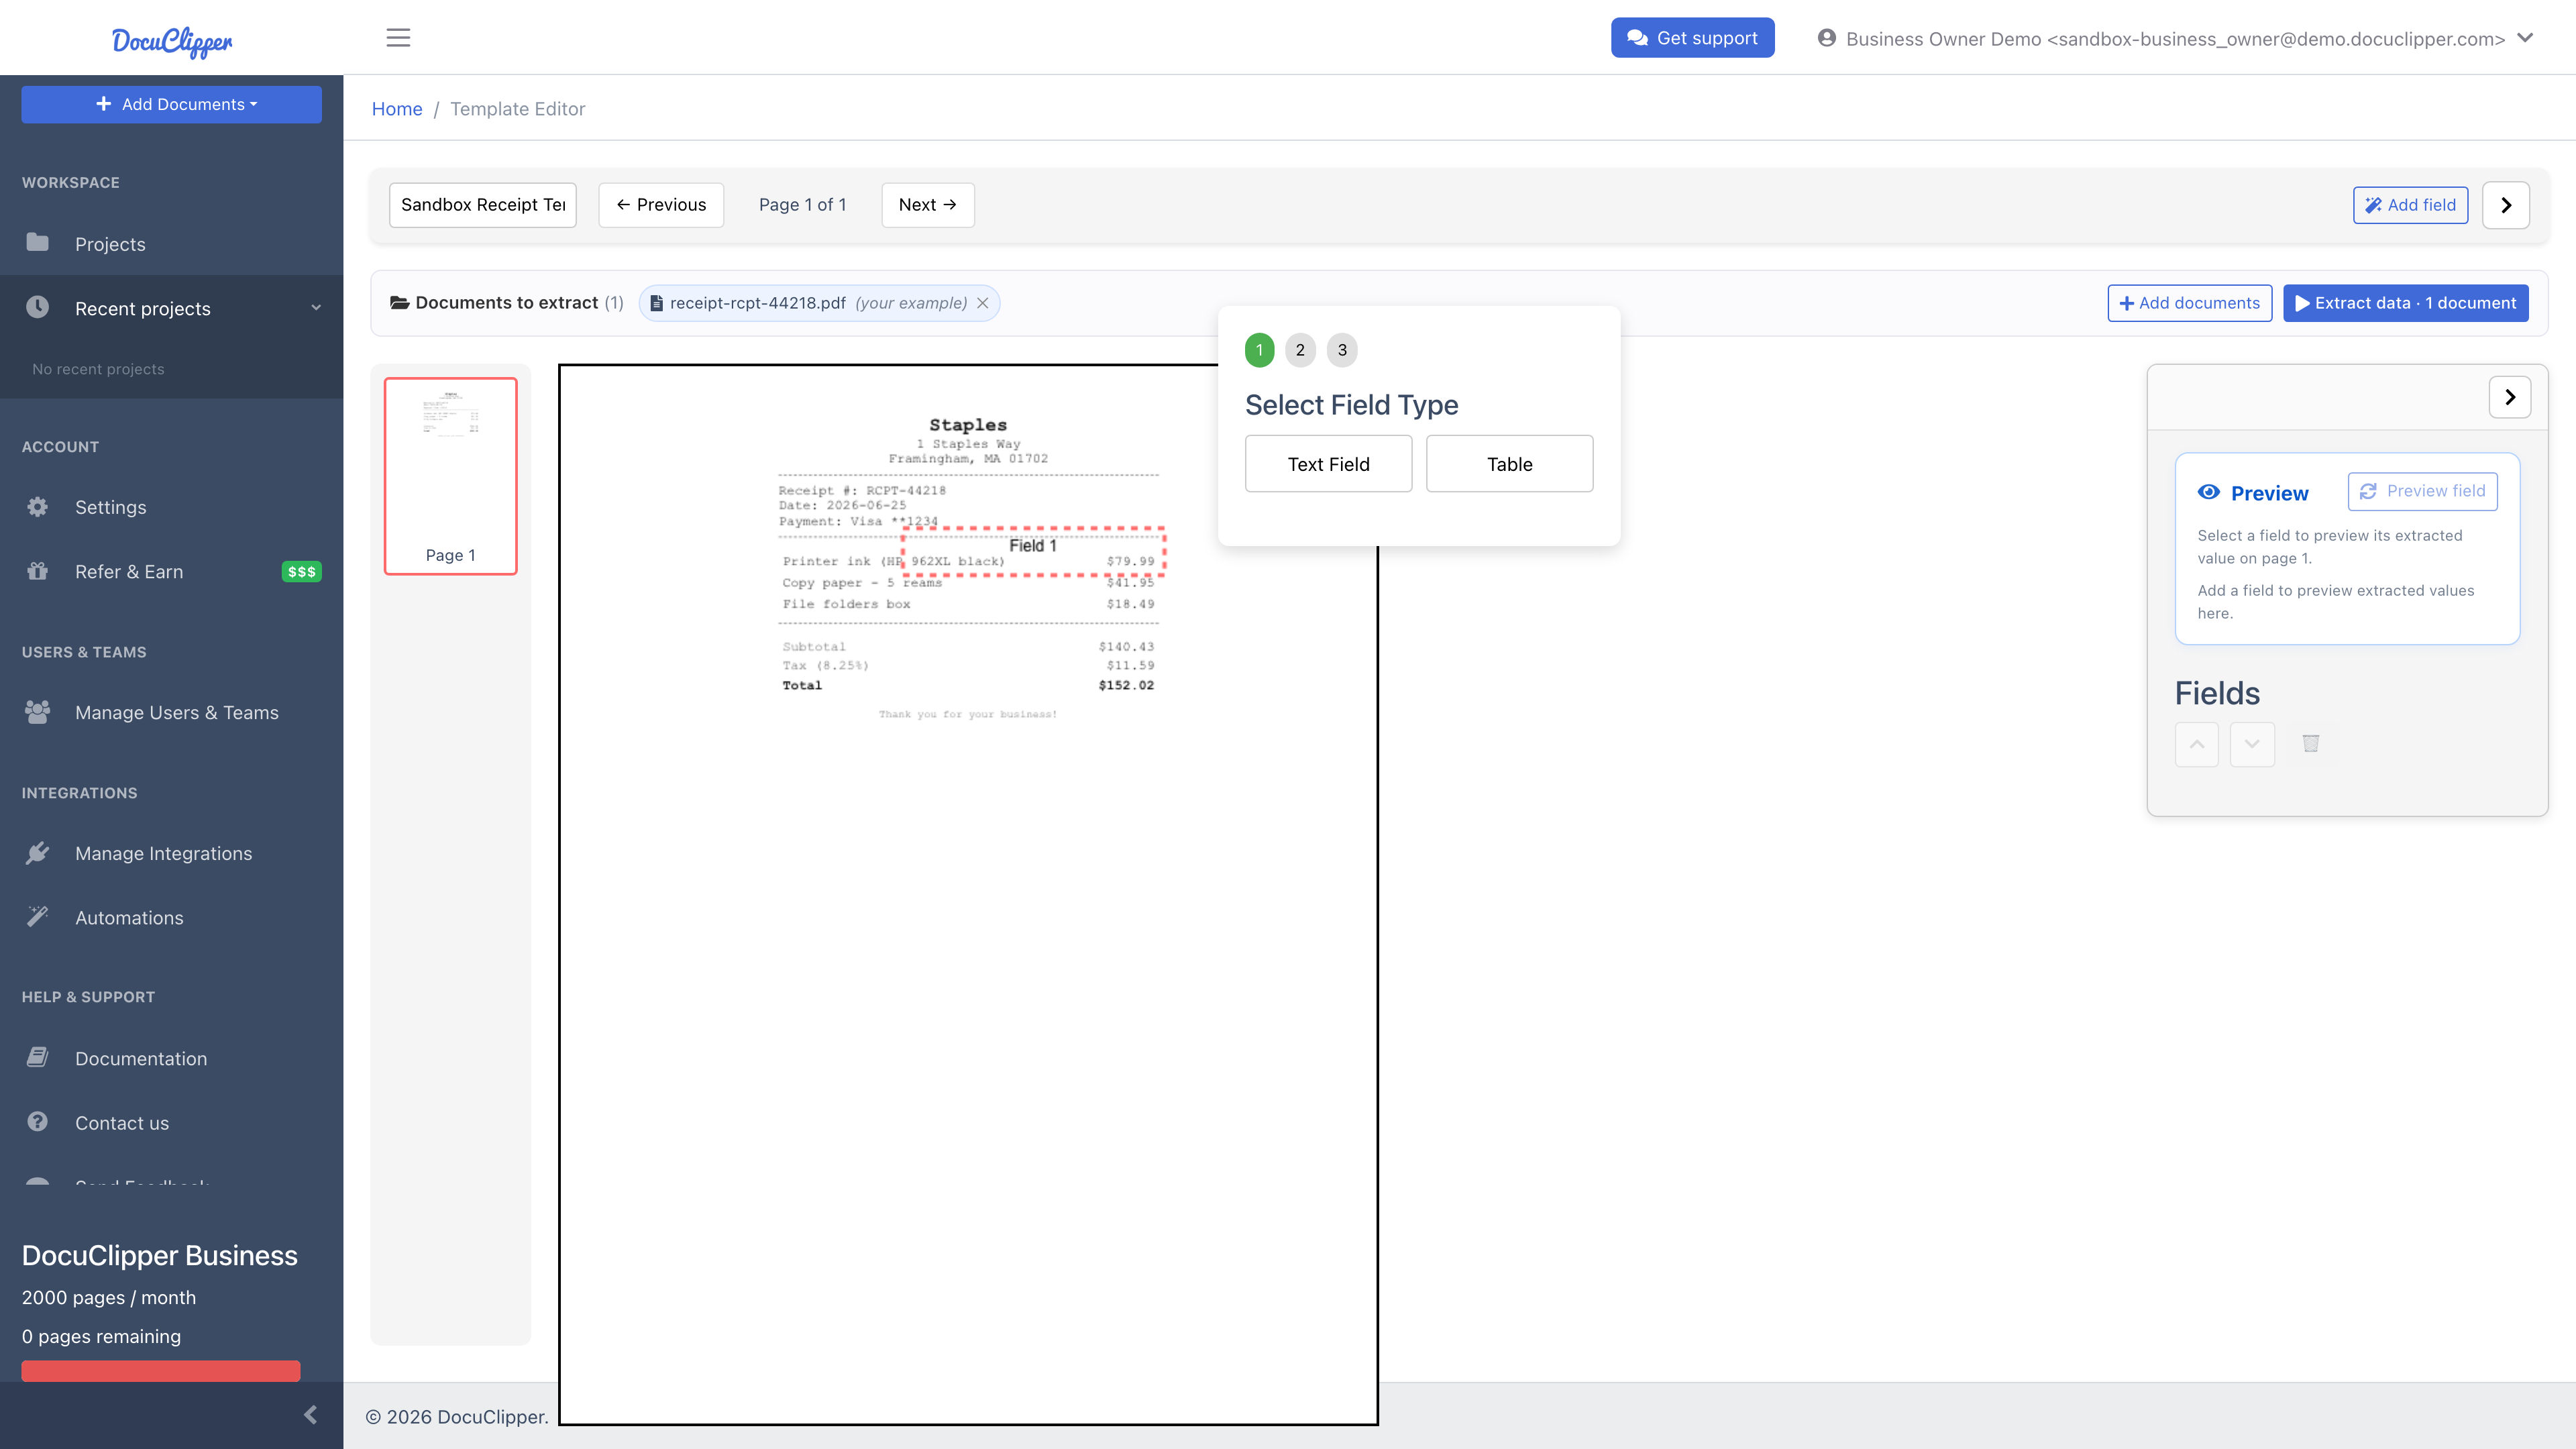
The editor opens with an Add a field prompt. Every field you add auto-previews in the Preview panel on the right, so you can confirm the value as you build.
Two ways to define a field
For each value you want, pick whichever mode matches your document:
- AI prompt mode (recommended). Describe in plain English what you want and DocuClipper extracts it. Works on documents whose layout varies between samples (different vendors, lengths, scanned or text PDFs).
- Rectangle mode. Draw a box on the sample page and every future document in the same fixed layout gets the same box applied. Best when your documents come from one system and the field always lands in the same spot.
If you're unsure, start with AI prompt mode.
AI prompt mode
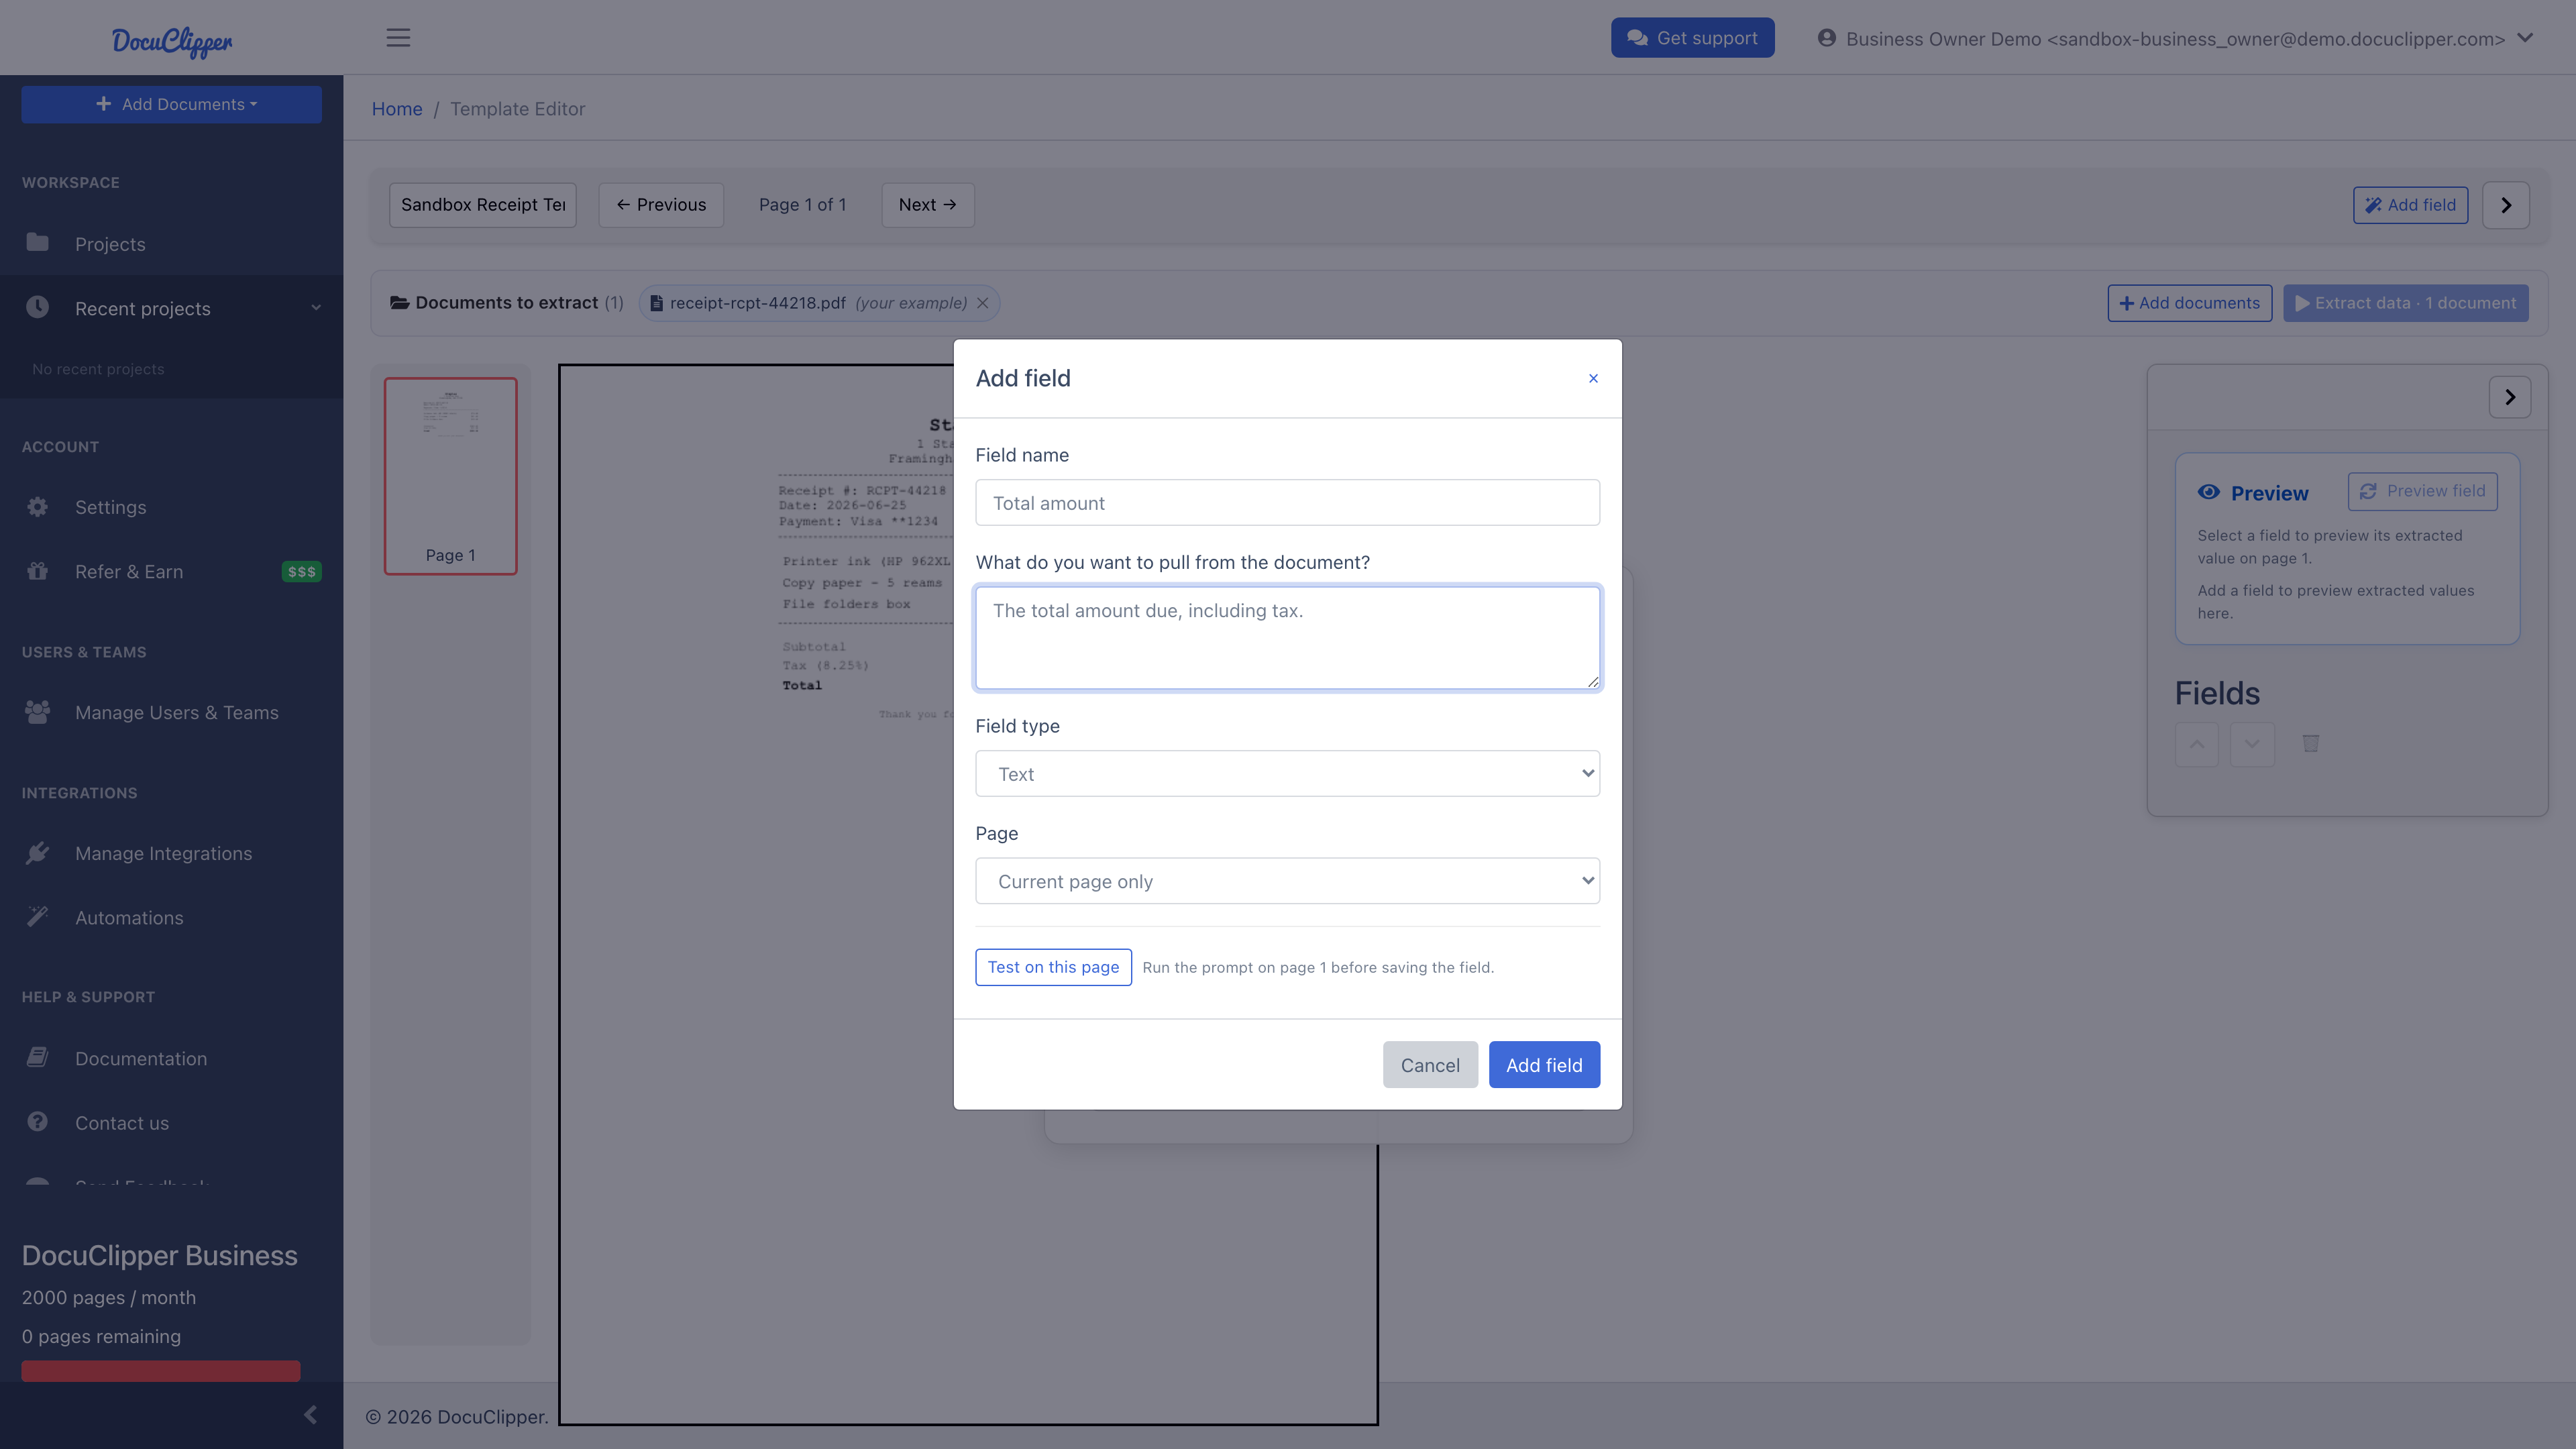
- Click Add field.
- Give the field a name (e.g. Total amount).
- Under What do you want to pull from the document?, write what you want in plain English. Be specific.
- Set Field type to Text (one value) or Table (a repeating block of rows with named columns), and choose Page — Current page only or Any page.
- Click Test on this page to run the prompt on your sample. Edit the wording until the result is right, then add the field.
Writing good prompts:
- Be specific. "The invoice number" beats "the number at the top." "The total amount due, including tax" beats "the total."
- Name the document context if it's unusual: "On this rent roll, the unit number column."
- For tables, list the columns you want by name. "A table of line items with columns: description, quantity, unit price, total."
- For values that may not exist on every doc, tell the model: "If there's no PO number, return an empty value."
- Iterate. If the first prompt returns a wrong value, edit it and re-run. The preview is live.
When AI mode struggles: AI mode reads the document text. On scanned PDFs we run OCR first (Google Vision), so the model sees a transcription, not the image. If extraction is wrong on a scan, the issue is usually in the OCR layer, not the prompt. Two things help: re-export the PDF at higher resolution before uploading, and phrase the prompt around content rather than position ("The amount labeled Total Due" beats "the number in the top-right corner").
Rectangle mode
- Drag a rectangle around the data on the sample page.
- Pick a field type:
- Text — a single value (name, ID, free text)
- Number — numeric value, OCR cleanup applied
- Date — date value, OCR cleanup applied
- Table — a repeating block of rows; define column names and types (use this to pull the columns of a tabular statement)
- The Preview panel auto-runs the field and shows what's in the box. Adjust the rectangle if the value is off.
Rectangle mode applies the same coordinates to every page of every document you run this template on. If your future documents won't have fields in the exact same position, use AI prompt mode instead.
Saving the template
Once the preview looks right, type a name you'll recognize later (e.g. "ClientCo Monthly Trust Statement") and click Create template. DocuClipper remembers every field, type, and prompt. In the Preview panel you can also Copy or Download an individual field's value on the spot.
We assume one template per document type, so a single template should handle every document of that layout. If a sub-set of your documents looks different, save a second template.
Reusing a template
Next time you have documents in the same layout:
- Open the saved template from your My templates list (Add Documents → Other Documents, then choose the template).
- In the Documents to extract bar, click Add documents and upload one file or a batch. Your original sample stays in the set tagged (your example) — remove it if you don't want it in the results.
- Click Extract data to run the saved fields on every document at once — no re-drawing needed. The results land in a single table you can export to Excel or CSV.

Updating a template
If the source document changes (e.g. the bank redesigned the statement), open the template from My templates, click its ⋮ actions menu, and choose Edit. Adjust the fields or prompts (or upload a new sample), then click Update template — the template ID stays the same, so any saved automations keep working.
Worked examples
These are real templates customers run on DocuClipper. Use them as a starting point.
Rent rolls
Rent rolls vary wildly between property-management systems (Yardi, AppFolio, Buildium, RentManager), so AI prompt mode is the only practical option.
Single-value fields:
- Property name: "The property name shown at the top of the report."
- Report date: "The 'as of' date for this rent roll. Return in YYYY-MM-DD."
- Total monthly rent: "The grand total monthly rent across all units."
Table field:
- Prompt: "A table of units with columns: unit number, tenant name, lease start, lease end, monthly rent, security deposit, status (occupied/vacant/notice). Include every unit listed, including vacant ones."
- Page range: All pages.
Trust account statements
For attorneys, real-estate brokers, and title companies. Layout is consistent within one provider, so rectangle mode works if you have one provider, AI mode if you handle multiple.
Single-value fields:
- Trust account number: AI prompt "The trust or escrow account number, usually shown near the top." Or rectangle around the account-number block.
- Statement period: AI prompt "The statement period date range. Return as start_date,end_date in YYYY-MM-DD."
- Beginning balance and ending balance: AI prompt "The beginning trust balance for this period." / "The ending trust balance."
Table field:
- Prompt: "A table of disbursements and deposits with columns: date, matter or client name, check number, payee or payor, amount, running balance."
Packing slips and delivery receipts
Single-value fields: Order number, PO number, ship date, carrier, tracking number — one AI prompt each, named directly.
Table field:
- Prompt: "A line-item table with columns: SKU, description, ordered quantity, shipped quantity, backordered quantity. If no backorder column exists, leave it empty."
ACORD insurance forms (e.g. ACORD 25 Certificate of Liability)
ACORD forms have stable government-mandated layouts, so rectangle mode is the right fit. Draw boxes around the producer block (broker name and address), the insured block, and each policy row (insurer, policy number, eff/exp dates, limits). Save one template per ACORD form number — ACORD 25, 27, and 28 each need their own because the field positions differ.
Lease agreements
Lease language varies, so AI mode is best.
- Tenant name(s): "The full legal name(s) of the tenant(s) on this lease, comma-separated if more than one."
- Property address: "The full address of the leased property."
- Lease term: "The lease start and end date as start,end in YYYY-MM-DD."
- Base rent: "The base monthly rent amount, as a number."
- Security deposit: "The security deposit amount, as a number. If none, return 0."
Custom client memos and one-off PDFs
If you run the same kind of summary memo each month from one client (project status, billing summary, etc.), AI prompts let you pull the half-dozen numbers you care about and skip the rest. Save one template per memo format.
Requesting bank statement support
If you'd rather not build a custom template for an unsupported bank, ask our support team to add support for that statement — include a sample. It may take a couple of days for the support to be added.