Downloading Bank Transactions
Export converted bank statement transactions to Excel, CSV, QBO, IIF, Xero, Sage, or Quicken with custom columns and date formats.
Last updated
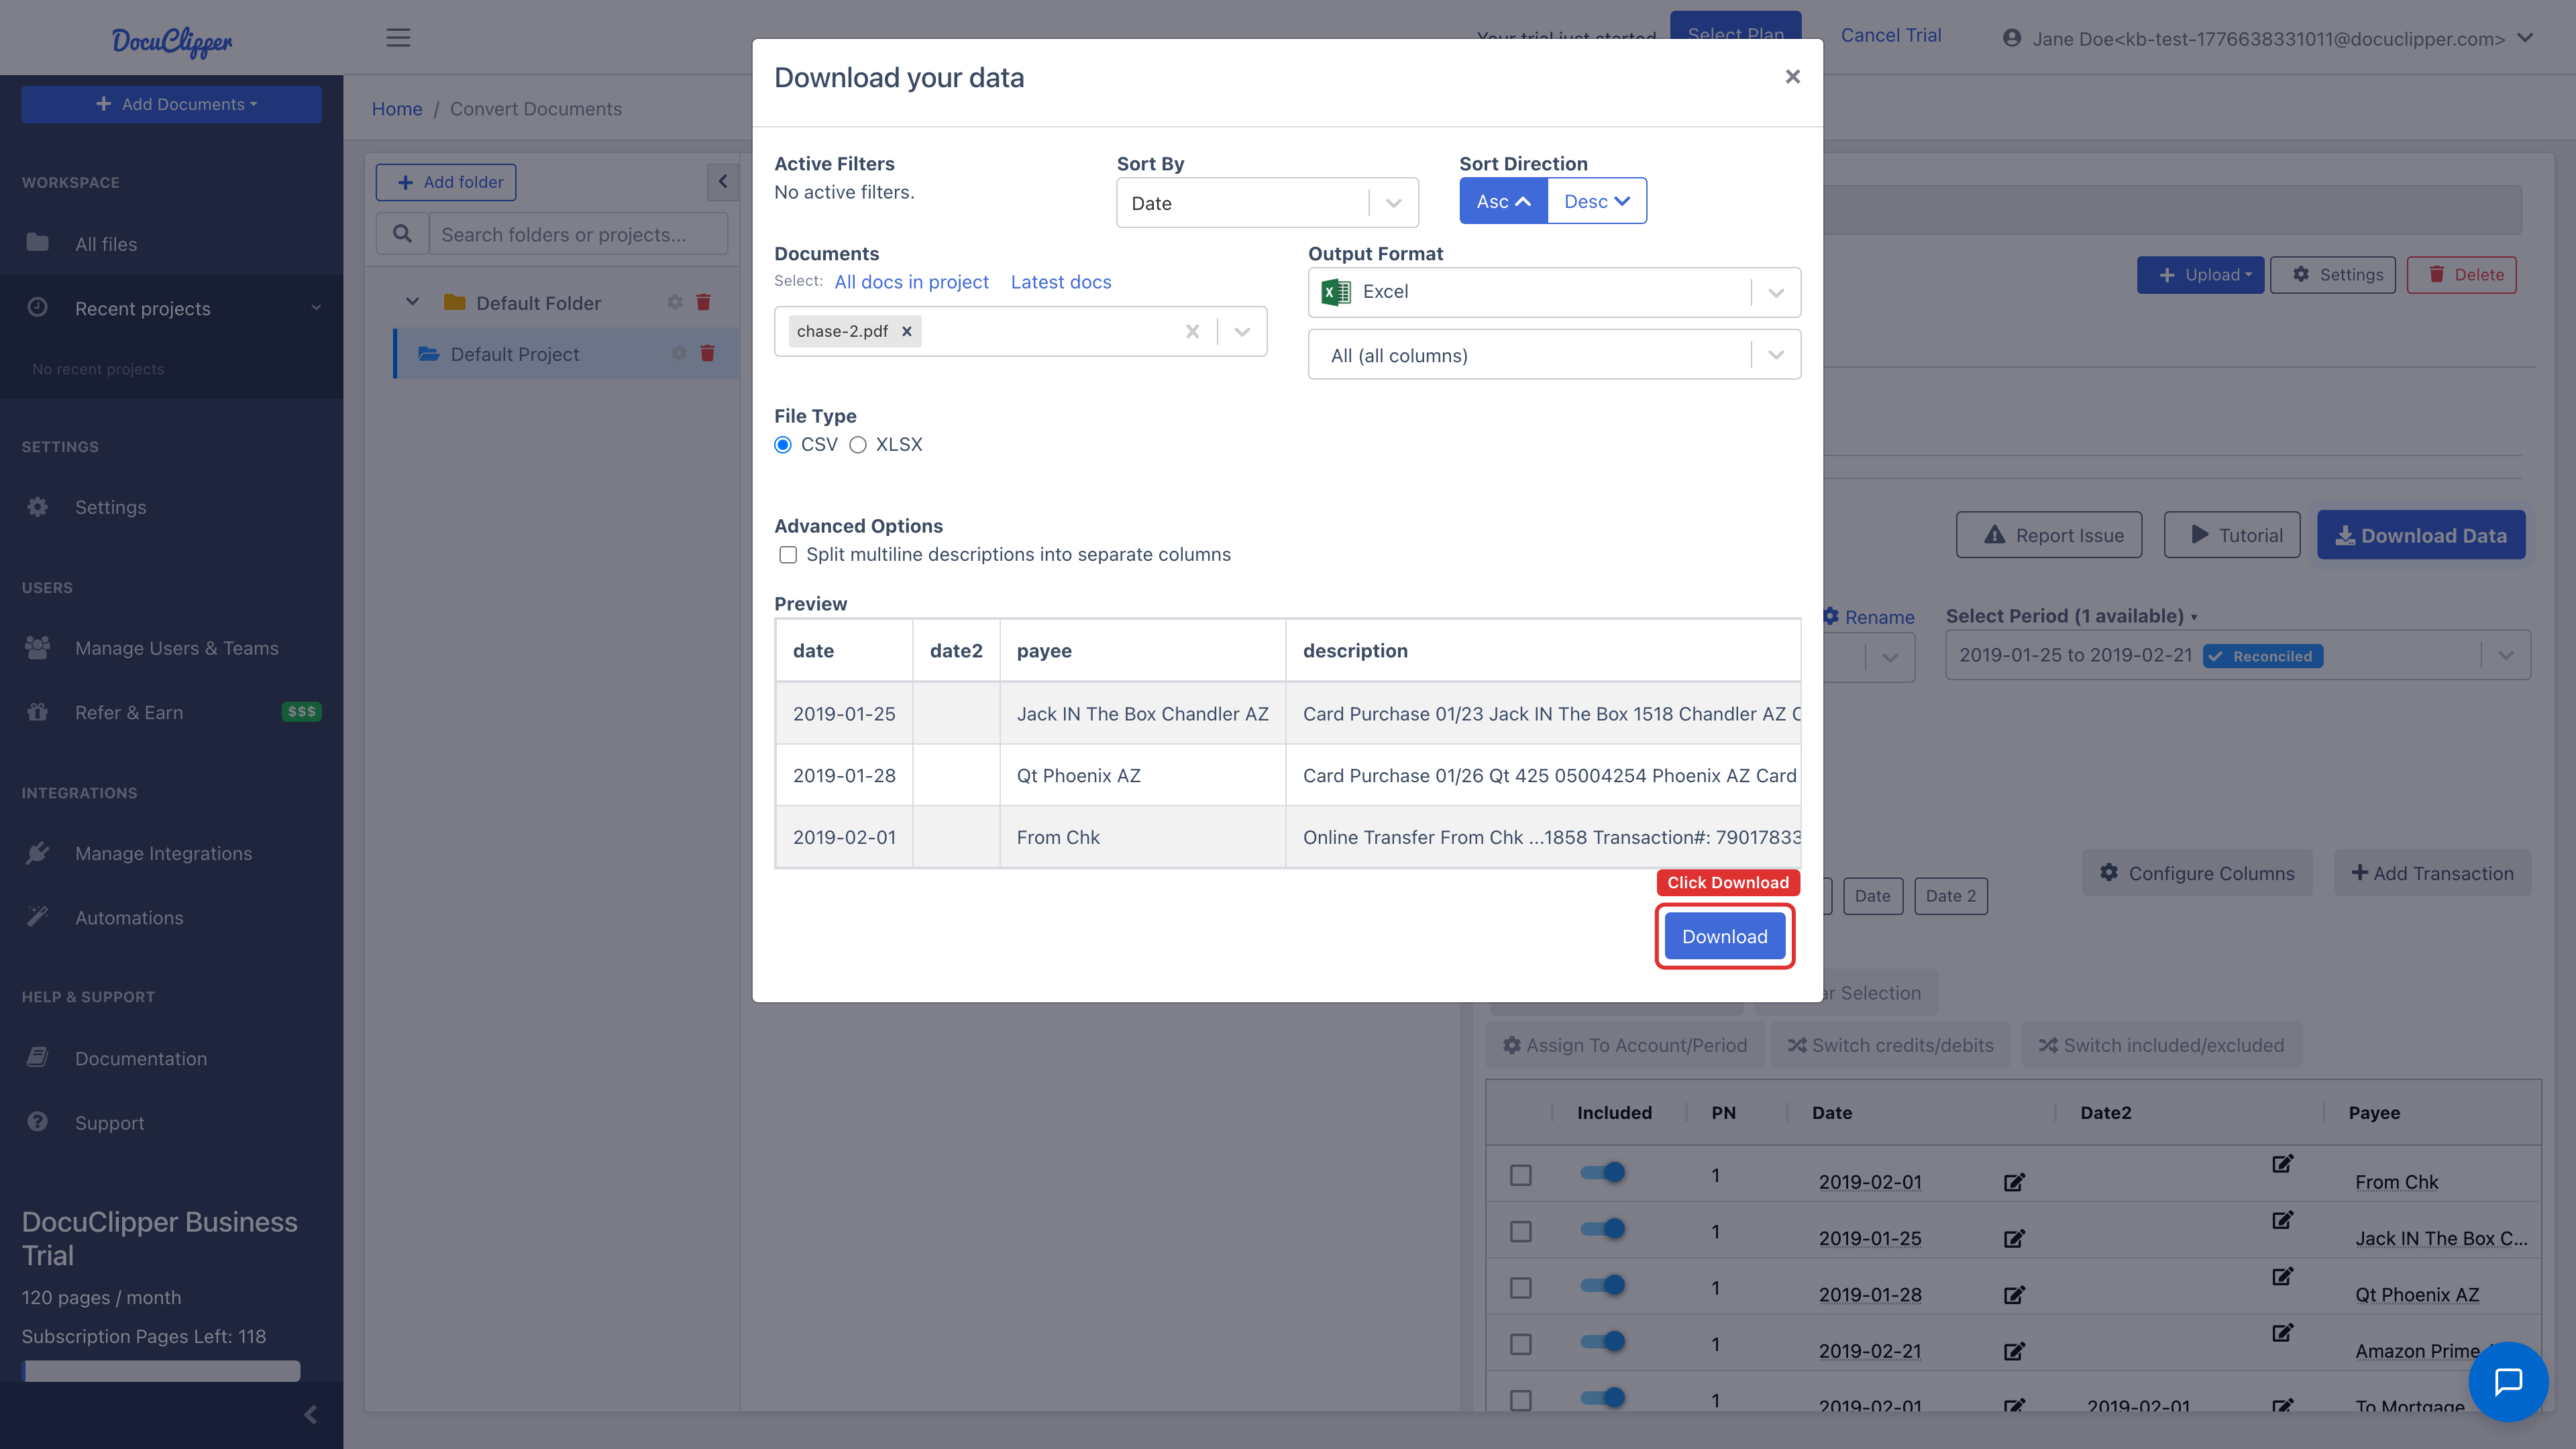
DocuClipper exports converted bank transactions to Excel (.xlsx), CSV, QBO Web Connect, QuickBooks Desktop IIF, Xero CSV, Sage CSV, and Quicken QIF from the Download Data button in the top-right of any project's transactions view.
Inside the download dialog you can pick the sort order, choose which uploaded statements to include, build a custom column set, set the date format, and split multi-description fields or one-file-per-account in Advanced Options. A live preview shows the selected columns before you download.
How do I open the DocuClipper download dialog?
- Open the project containing your converted statement(s).
- Click Download Data in the top-right of the transactions view.
Download options
| Option | What it controls |
|---|---|
| Sort | Order rows by date (ascending / descending) or by the order they appeared on the original statement. |
| Documents | Which uploaded statements to include in the export. |
| Output Format | Excel (.xlsx), CSV, QBO Web Connect, QuickBooks Desktop IIF, Xero CSV, Sage CSV, Quicken QIF, and more. |
| Columns | Which fields to include. See Custom columns below. |
| Date Format | How dates appear in the output (ISO, US, UK, or abbreviated month). |
| Advanced Options | Split multi-description fields into separate columns; produce one file per account; include/exclude excluded rows. |
| Preview | Live preview of the columns you've selected. |
Configuring custom columns
You can build your own column set for Excel and CSV exports and save it for reuse.
- Click the Columns selector under Output Format.
- Click Add New Custom Columns.
- Click Add a column, pick a source field from the dropdown (only fields DocuClipper extracts are listed), and check the box to include it.
- Click the header cell to rename the column to whatever your downstream system expects.
- Click Close to save. The configuration is remembered for this project, and you can promote it to your account default from Settings → Export templates.
Understanding ZIP downloads
DocuClipper bundles the output in a ZIP file when:
- Multiple accounts are exported separately: one file per account.
- The output exceeds format-specific size limits: e.g. a QBO file that would be larger than ~250 KB gets split.
- Source PDFs are included: the ZIP bundles originals with the data file.
Always extract the ZIP before importing into QuickBooks or Xero. These apps won't read the file through the archive. See DocuClipper exports data in zip file for details.
Re-downloading
Downloads are regenerated on demand. Closing the tab or clicking away doesn't lose your data. Open the project again, click Download Data, and re-export with the same or different settings.
FAQs
Which output formats does DocuClipper support?
Excel (.xlsx), CSV, QBO Web Connect, QuickBooks Desktop IIF, Xero CSV, Sage CSV, and Quicken QIF, among others. Pick the format from the Output Format dropdown in the download dialog.
Can I choose which columns appear in my export?
Yes. For Excel and CSV exports, use the Columns selector to build a custom column set, rename headers to match your downstream system, and save the configuration for reuse in the project.
Why does DocuClipper give me a ZIP file instead of a single file?
ZIPs are produced when multiple accounts are exported as separate files, when the output exceeds a format's size limit (for example a QBO file over about 250 KB), or when source PDFs are bundled with the data file.
Do I have to extract the ZIP before importing?
Yes. QuickBooks and Xero will not read files through the archive. Extract the ZIP first, then point the import at the unzipped data file.
Can I sort transactions before exporting?
Yes. The Sort option lets you order rows by date ascending, date descending, or by the order they appeared on the original statement.
Can I re-download a file later?
Yes. Downloads are regenerated on demand, so closing the tab does not lose your data. Reopen the project, click Download Data, and export again with the same or different settings.