Step 1: Upload your Invoice or Receipt
- Log in to DocuClipper: Access your account by entering your credentials.
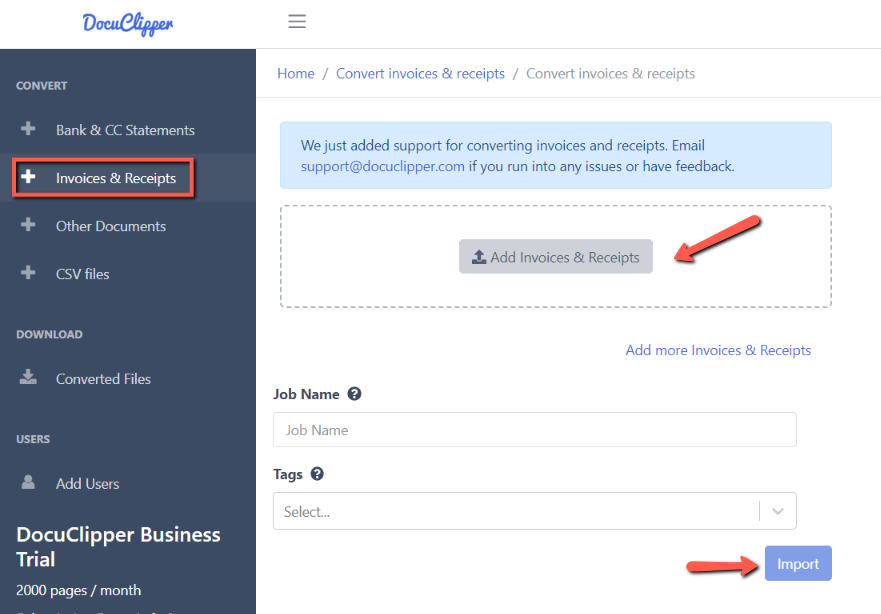
- Navigate to Data Extraction: Click on “Invoices & Receipts” located in the left sidebar at the top under “Convert” or within the dashboard main page.
- Upload Your Scanned or PDF Invoice or Receipt: Drag and drop one or more PDFs or scanned of your Invoice or Receipt.
- Import File: Once the upload is complete, click on “Import”

Step 2: Export Your Invoice and Receipt to Excel
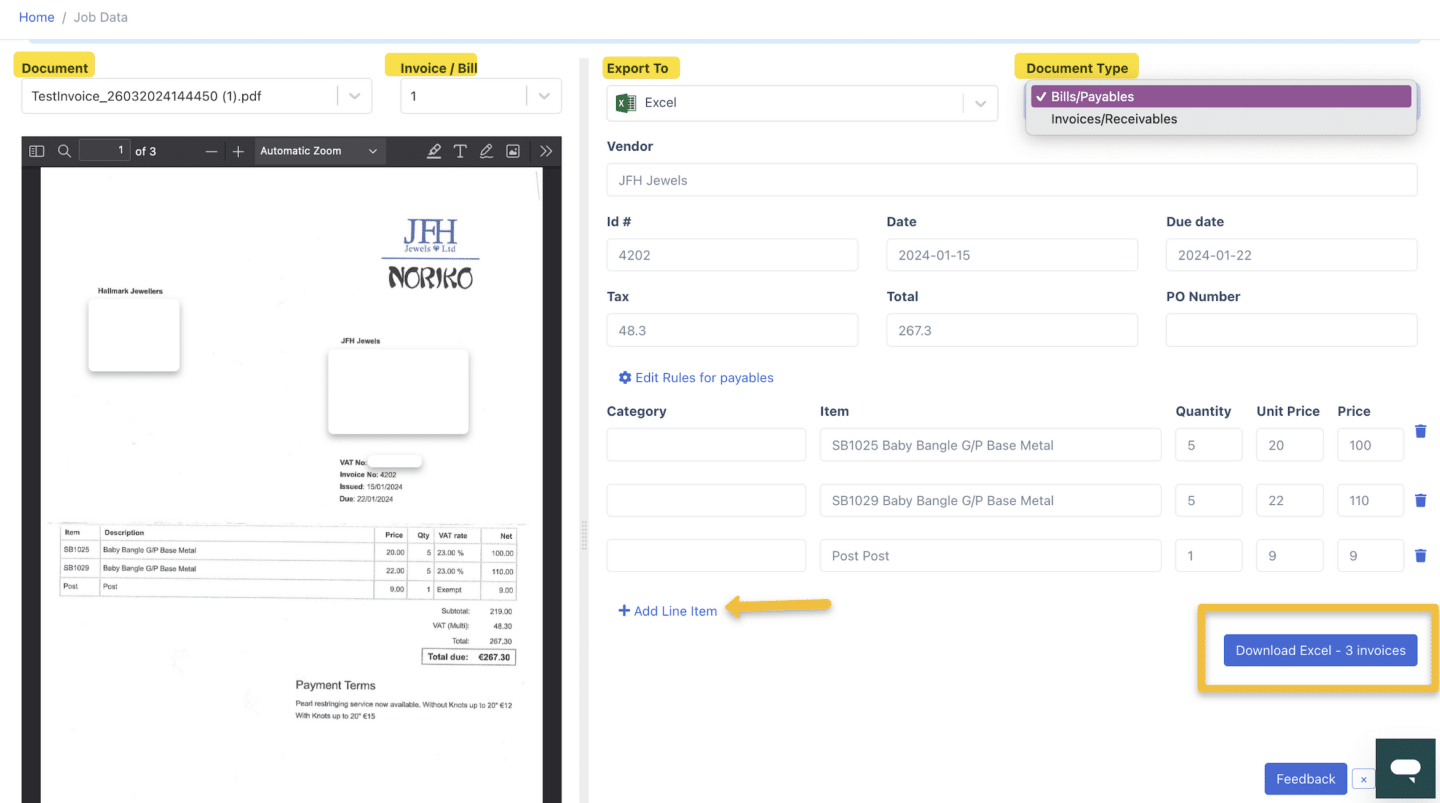
- Select Output Format: You may download the file by clicking “Export to” and choose “Excel or CSV”
- Edit fields: if necessary, you can edit the invoice number, date, etc.
- Configure line items: You can add line items by clicking on “Add line Item” and remove any line items that you don’t need by clicking on “Delete Line Item“.
- Finalize Download: Click on “Download”.

Note: Email support@docuclipper.com if you run into any issues or have feedback.


