
Using The Invoices List
Navigate the Invoices list in DocuClipper: filter each column, open an invoice to edit or export it, add more documents, and download in bulk.
Last updated
Overview
The Invoices list is where you see every invoice, receipt, and bill converted in a project. From here you filter with the per-column filter row, add more documents, download data in bulk, and open any invoice to edit, approve, match, or export it.
Where to find the Invoices list
- Open your workspace (All files) and select a project.
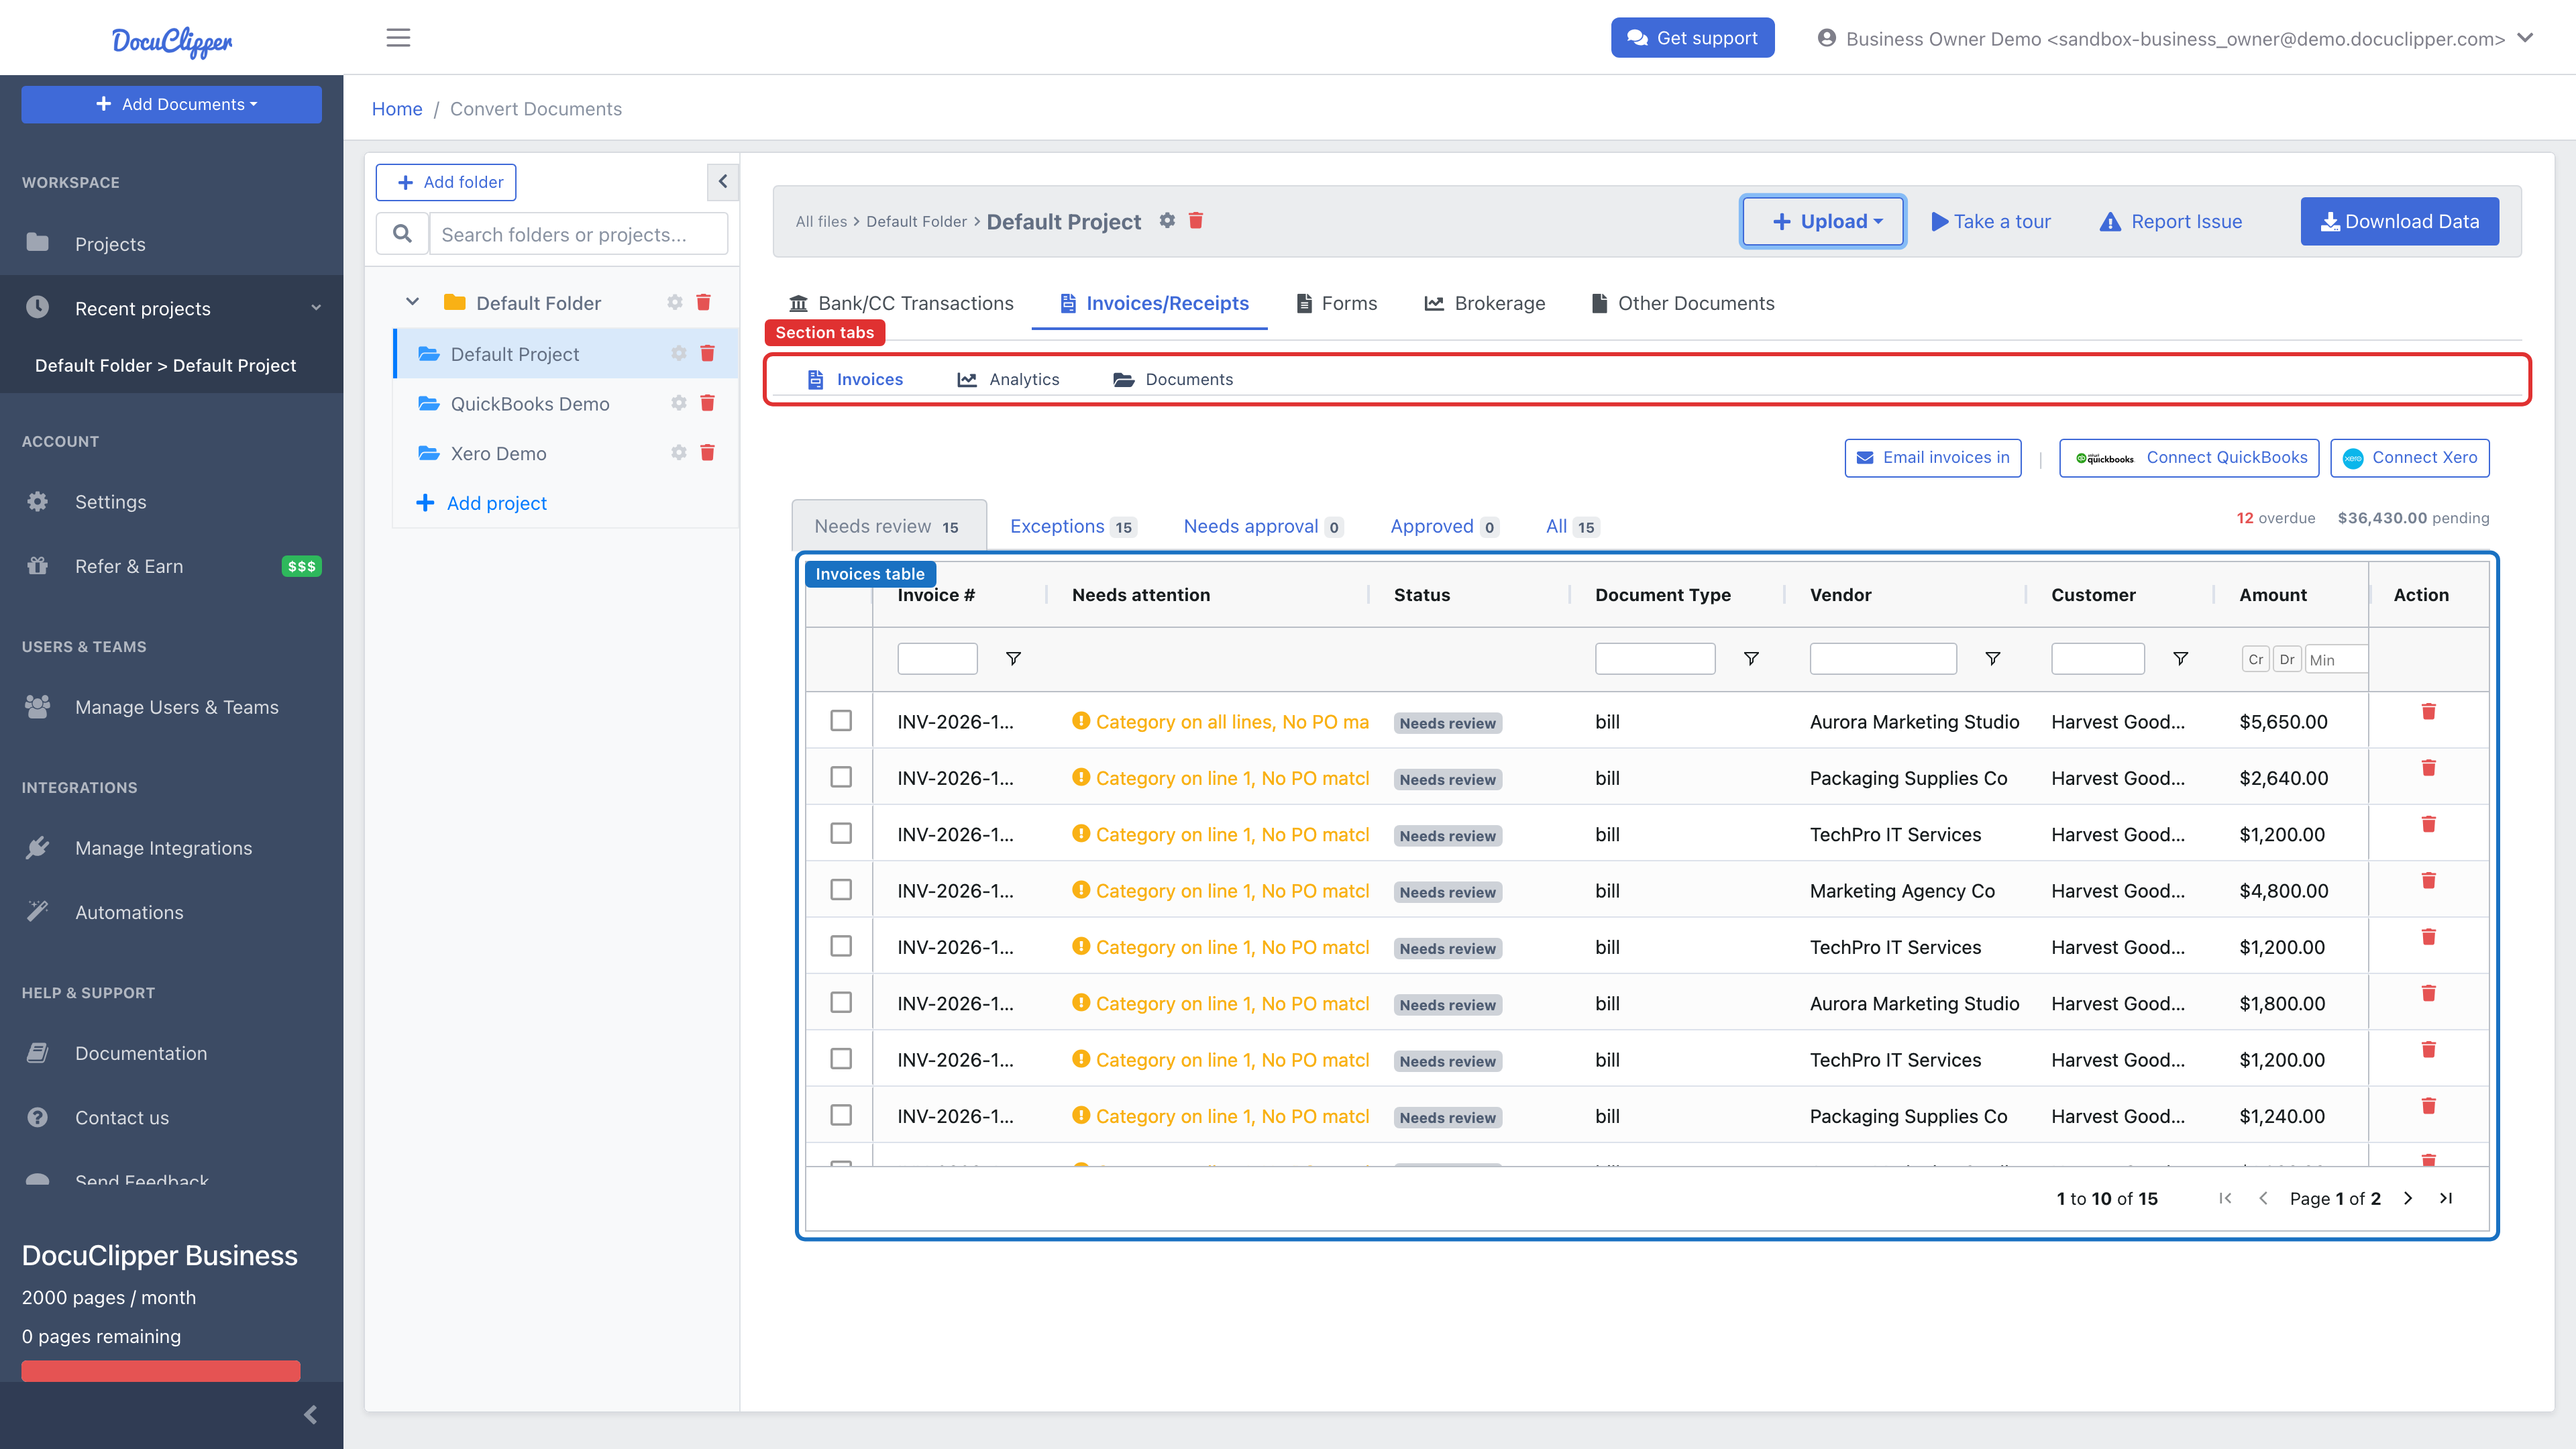
- If the project holds Invoices/Receipts, open it. The invoices workspace opens with a row of section tabs across the top.
- The Invoices tab shows the list (a table of converted invoices).
Section tabs
The Invoices workspace is split into three tabs:
- Invoices – The full table of converted invoices (described below), with the accounts-payable workflow presets — Needs review, Exceptions, Needs approval, Not synced, Approved, All — and their KPI cards above it. These were a separate AP Queue view until they moved onto the list itself; see Invoice workflow presets.
- Analytics – Spend by top vendor, a paid/overdue status breakdown, and a summary aging report.
- Documents – The underlying uploaded PDFs.
A pending or needs approval badge appears on the Invoices tab when the approval workflow has items waiting.
Table columns
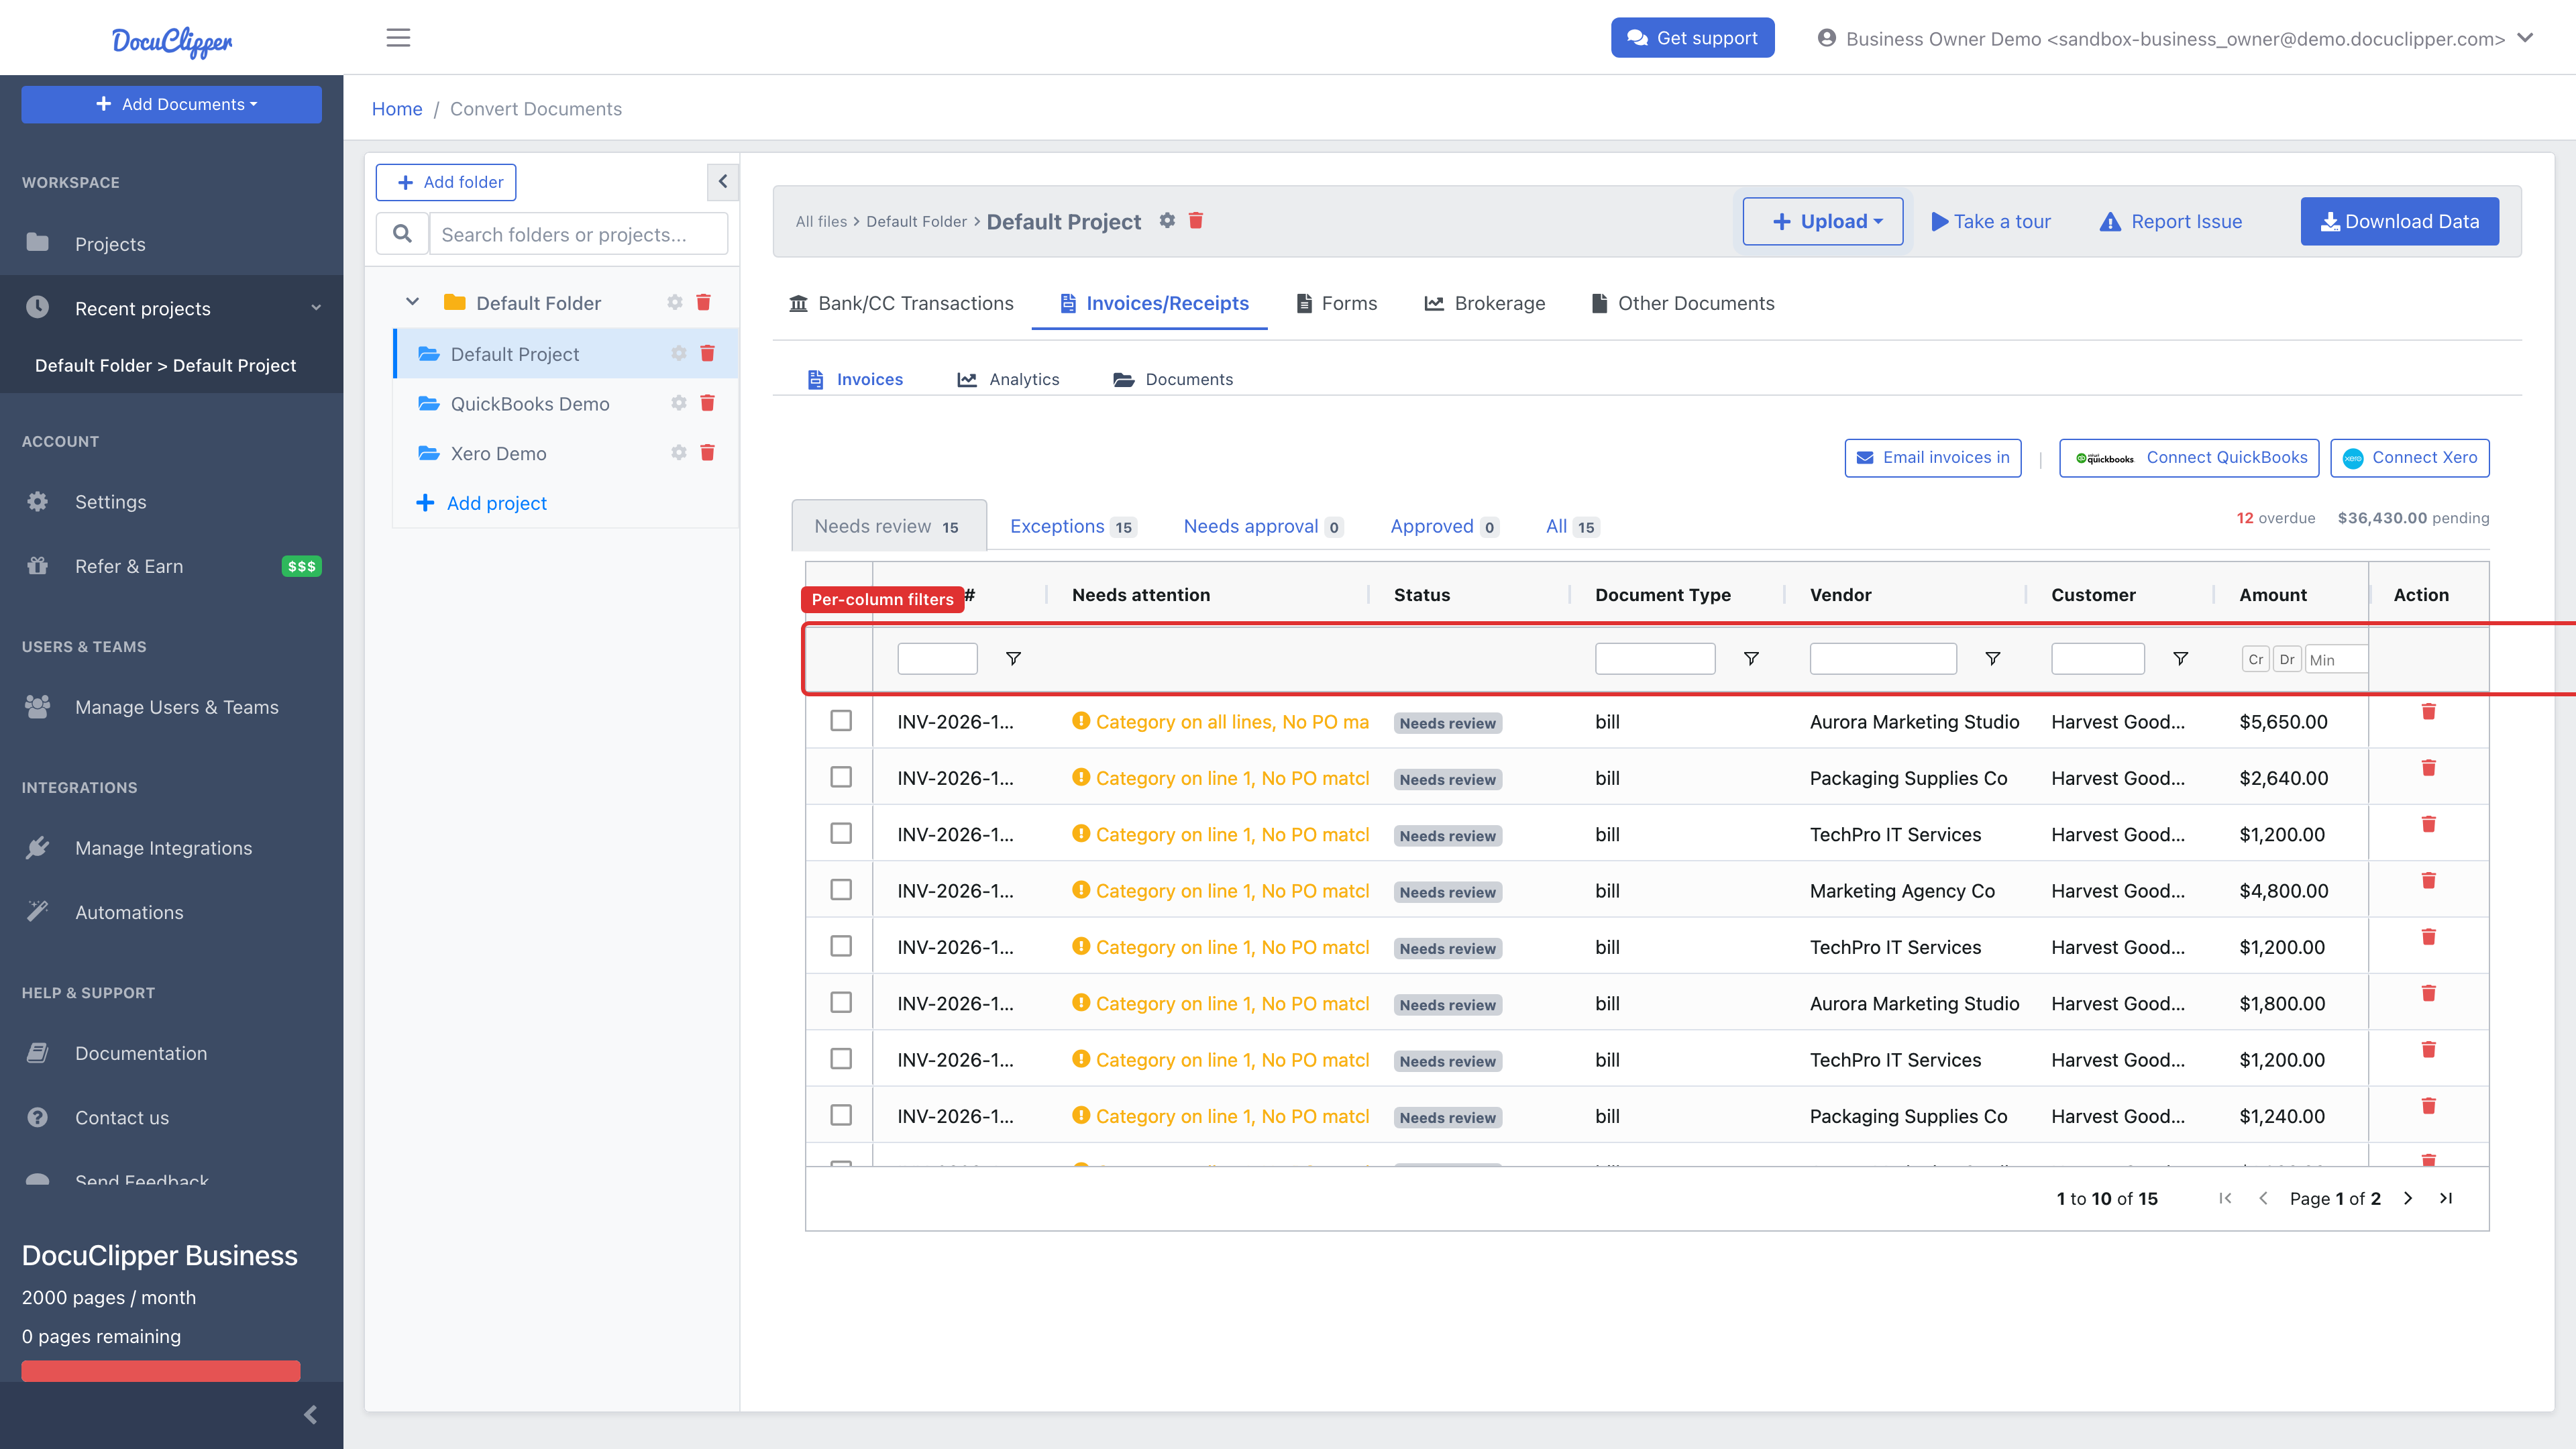
Each column has its own filter box in the row directly under the header. The columns are:
- Invoice # – Extracted invoice number.
- Needs attention – Everything wrong with the invoice in one cell: the fields it's missing (for example Category on lines 2, 3), its exception flags (Duplicate, No PO match, No bank match), or the accounting system's own error message if a sync was rejected. Reads Ready to sync when nothing is blocking it. Use it to work the list top-down instead of opening each invoice to find out what's missing.
- Status – Where the invoice is: Needs review, Awaiting approval, Approved, Rejected, Sync error, Synced, or Paid. Once synced, the badge links to the document in QuickBooks or Xero.
- Document Type – Bill, Expense, Invoice, or payables/receivables.
- Vendor – Extracted (or matched) vendor name.
- Customer – Extracted customer name.
- Amount – Invoice total.
- Date – Invoice date.
- Due Date – Editable inline (click the cell to set or change it). Aging and overdue calculations use this date.
- Approval – Pending, Approved, or Rejected (when the approval workflow is used). Kept alongside Status because Status shows Synced once an invoice posts, which would otherwise hide that it was approved.
Purchase-order matching, bank matching, and duplicate detection no longer have columns of their own — they appear in Needs attention on the invoices they affect, and the Exceptions preset finds all of them at once.
Sort by clicking a header, and type in the filter row to narrow the list — for example, set Approval to Pending to find invoices awaiting review.
Status and Needs attention are described in more detail in Invoice workflow presets.
Actions from the list
- Open an invoice – Click a row to open the invoice detail view, where you can edit fields, change document type, run rules, add or delete line items, submit for approval, match to bank transactions or purchase orders, and manage its Export & Sync state. When the project is connected to QuickBooks or Xero, invoices sync automatically (edits re-sync by id); you can also export to Excel.
- Bulk actions – Select rows with the checkbox column to reveal the toolbar: approve or reject (Business plan), mark or clear the duplicate flag, set a due date on several invoices at once, or delete the selected invoices.
- Add documents – Use the project's Add Documents dropdown and choose Invoices/Receipts to upload more PDFs. After conversion they appear in the list.
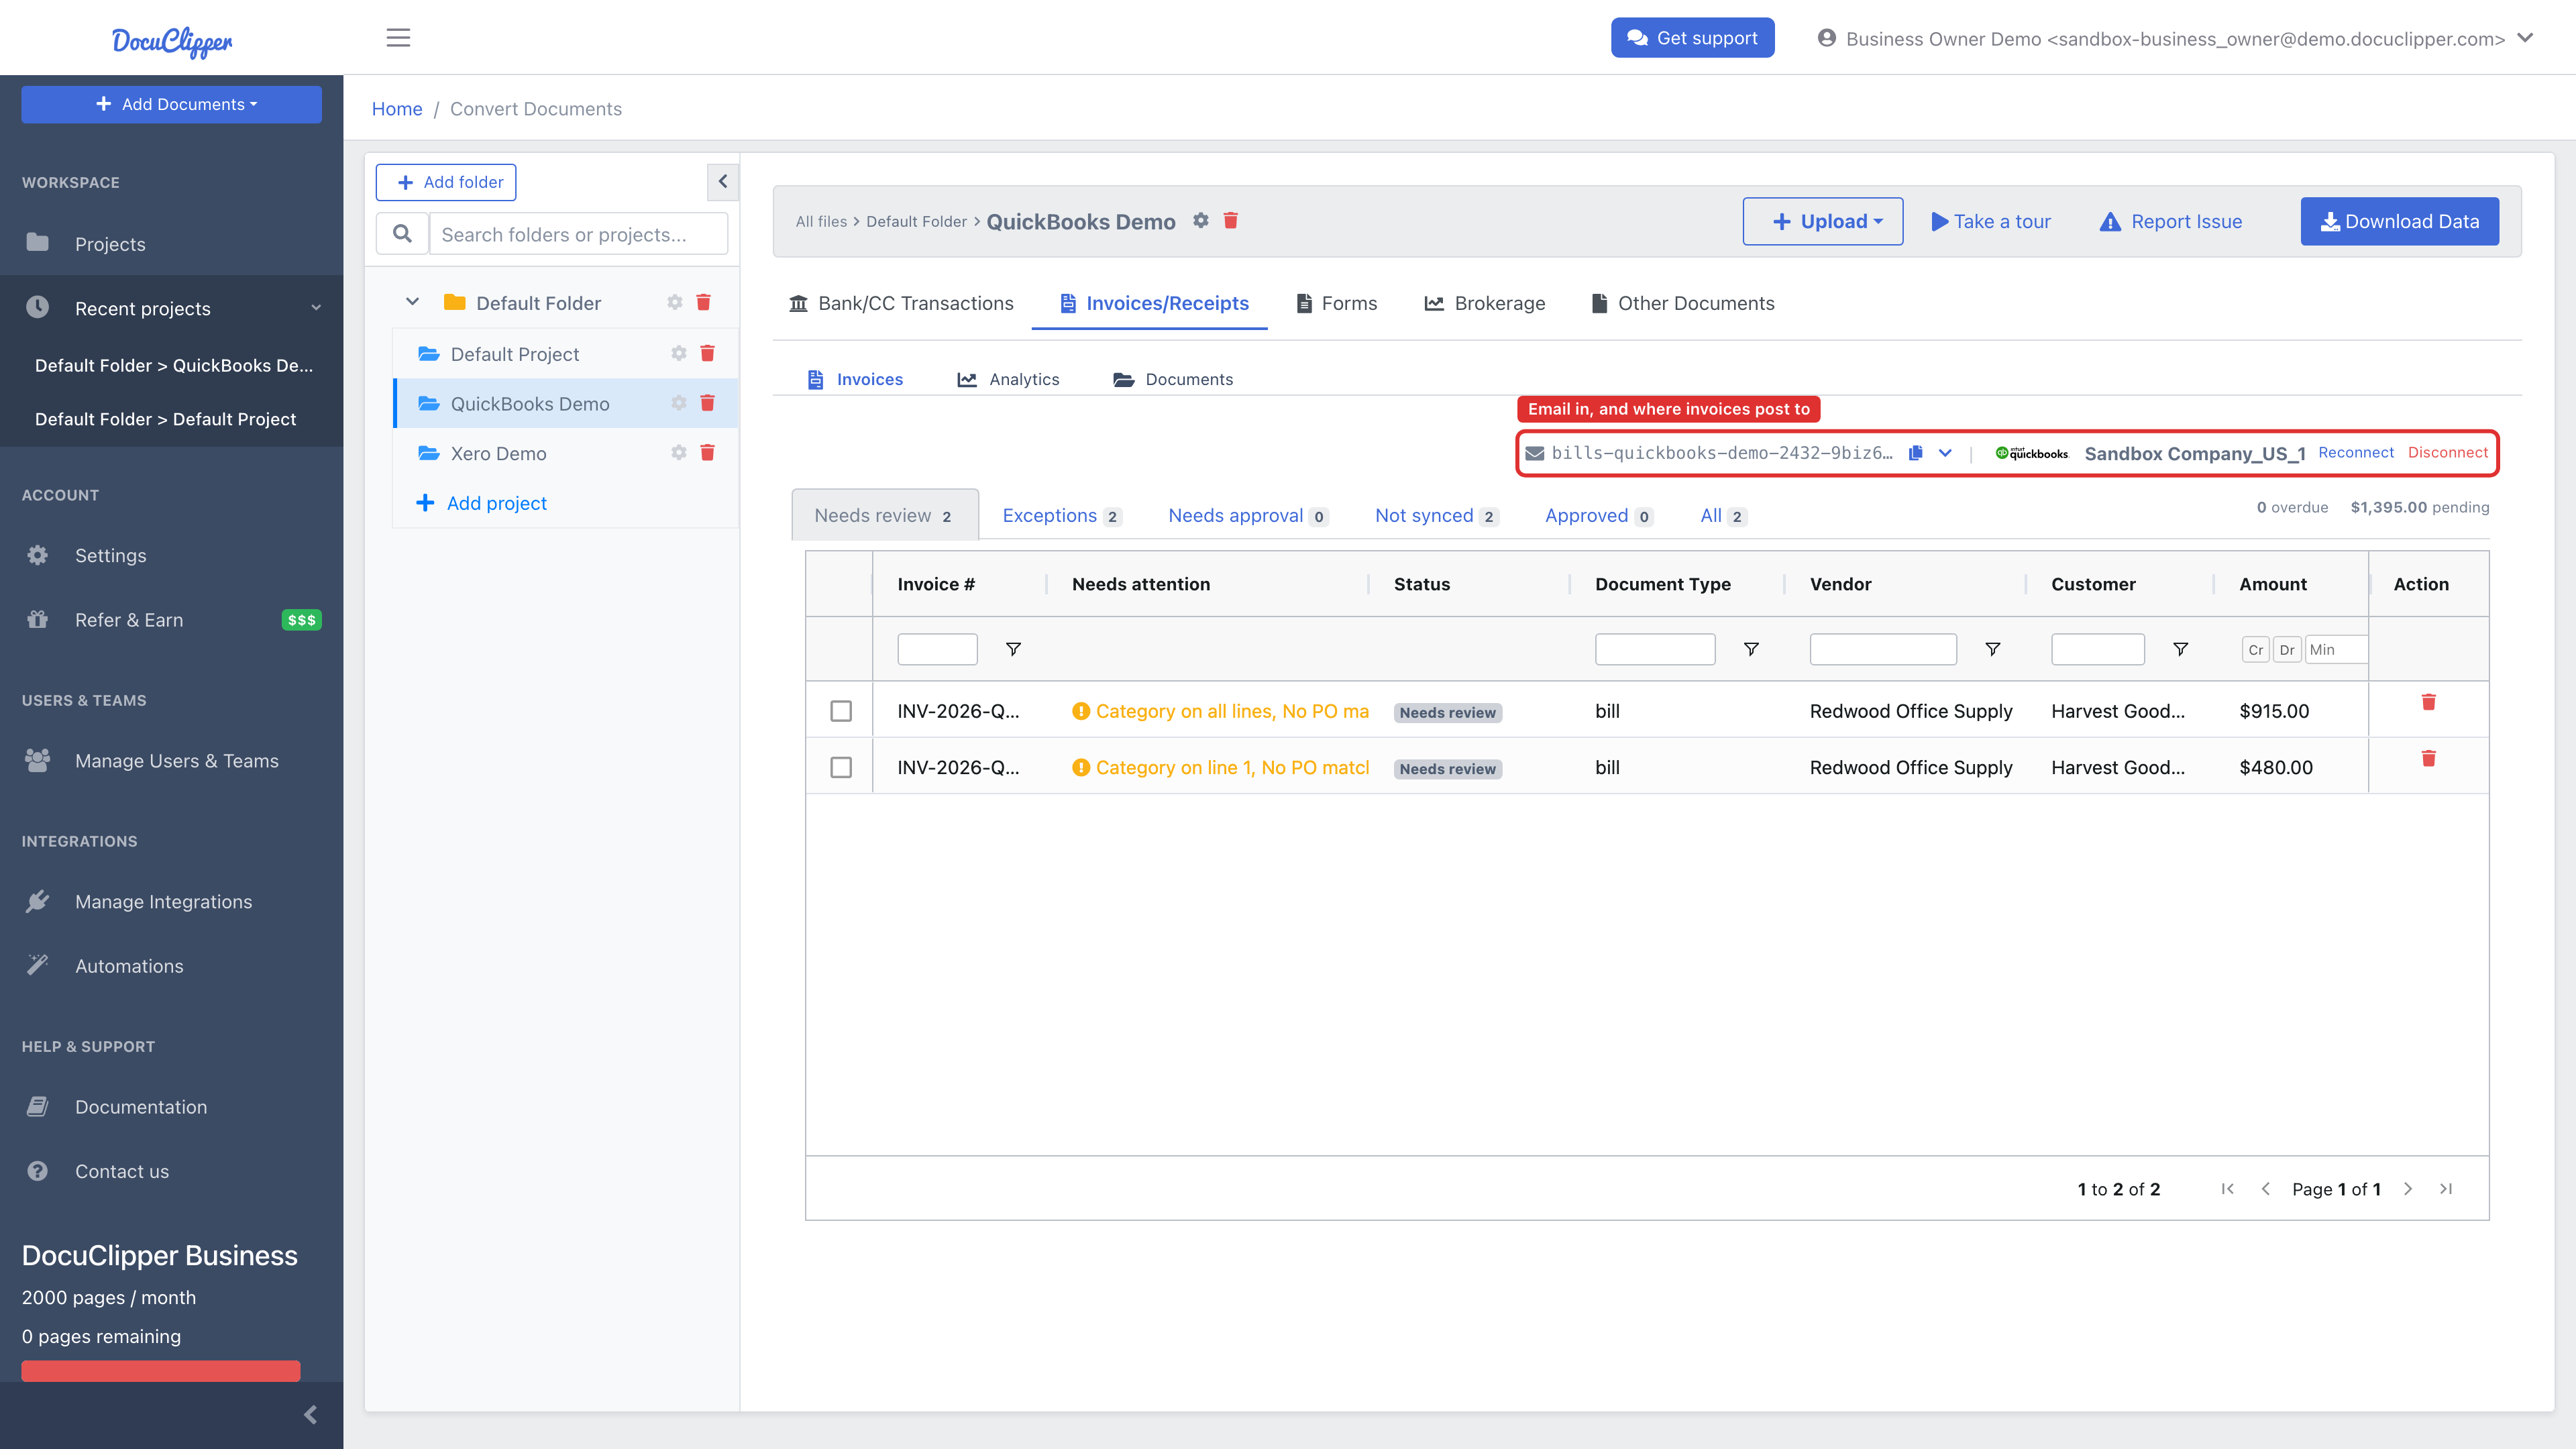
- Email invoices in – At the right of the row above the table, just before the accounting connection, an envelope icon shows the project's Bills & receipts (you pay) forwarding address, with a button to copy it. Anything sent to that address lands in this project, extracted and coded by your rules. Until that address exists the same spot reads Email invoices in. The chevron beside it opens a panel with the second address — Sales invoices (you send) — and cloud-folder inputs from Drive, OneDrive, Dropbox, or Box. See Automations: Email Forwarding.
- Accounting connection – To the right of the forwarding address, the same row shows which QuickBooks or Xero company this project posts to, with Reconnect and Disconnect. When nothing is linked it shows Connect instead. (Disconnecting leaves invoices already synced in your books; new ones stop syncing until you reconnect.)
- Download – Open the download modal to bulk-export. Choose which documents to include and the output format (Excel/CSV), with custom columns and extra fields. See Downloading invoices and receipts.
FAQs
What happened to the AP Queue?
Its views became workflow presets on the Invoices list itself — Needs review, Exceptions, Needs approval, Not synced, Approved, All — with KPI cards above the table. See Invoice workflow presets.
How do I tell what's wrong with an invoice without opening it?
Read the Needs attention column. It gathers the missing fields, the exception flags (Duplicate, No PO match, No bank match), and any error the accounting system returned, so you can work the list top-down. It reads Ready to sync when nothing is blocking.
What do the Status values mean?
Where the invoice is in the workflow: Needs review, Awaiting approval, Approved, Rejected, Sync error, Synced, or Paid. Once synced, the badge links straight to the document in QuickBooks or Xero.
How do I filter the list?
Every column has its own filter box in the row directly beneath the header. Combine them to narrow the table.
What's on the Analytics tab?
Spend by top vendor, a paid/overdue status breakdown, and a summary aging report. See AP aging report.
Why is there a badge on the Invoices tab?
A pending or needs-approval badge appears when the approval workflow has items waiting on someone.
Related articles
- How to import invoices and receipts into QuickBooks Online – Upload and convert, then export to QBO.
- Downloading invoices and receipts – Bulk download and custom columns.
- Editing invoice data – Editing fields, line items, and document type on the invoice detail page.