
How to Import Bank Statement Transactions into Quicken with a QFX File
Download a QFX (Web Connect) file from DocuClipper and import it into Quicken for Windows or Mac, when to use QFX instead of QIF, and how to fix common import errors.
Looking for the converter? Convert a PDF bank statement to QFX on the PDF to OFX and QFX Converter page. This article is the import-side tutorial for Quicken.
To get a converted bank or credit card statement into Quicken, download it from DocuClipper as QFX, then import it as a Web Connect file: in Quicken for Windows go to File > File Import > Web Connect (.QFX) File, and in Quicken for Mac go to File > Import > Bank or Brokerage File (OFX, QFX). Quicken then asks which account the transactions belong to.
QFX is the right format for checking, savings, and credit card accounts. Quicken does not accept QIF imports into those account types, so a QIF file will not work for a bank or card register.
QFX or QIF: which one should I download?
| Quicken account type | Format to download |
|---|---|
| Checking or savings | QFX |
| Credit card | QFX |
| Cash, asset, or liability (for example a house or vehicle account) | Quicken QIF, see Import into Quicken (QIF) |
Quicken for Windows only takes QIF imports into cash, asset, and liability accounts. Bank and credit card accounts receive transactions through Web Connect, which is what a QFX file is. If you are importing a bank or credit card statement, use QFX.
Step 1: Download the QFX file from DocuClipper
- Open the project that contains your converted statement.
- Click Download Data in the top-right of the transactions view.
- Under Output Format, choose QFX.
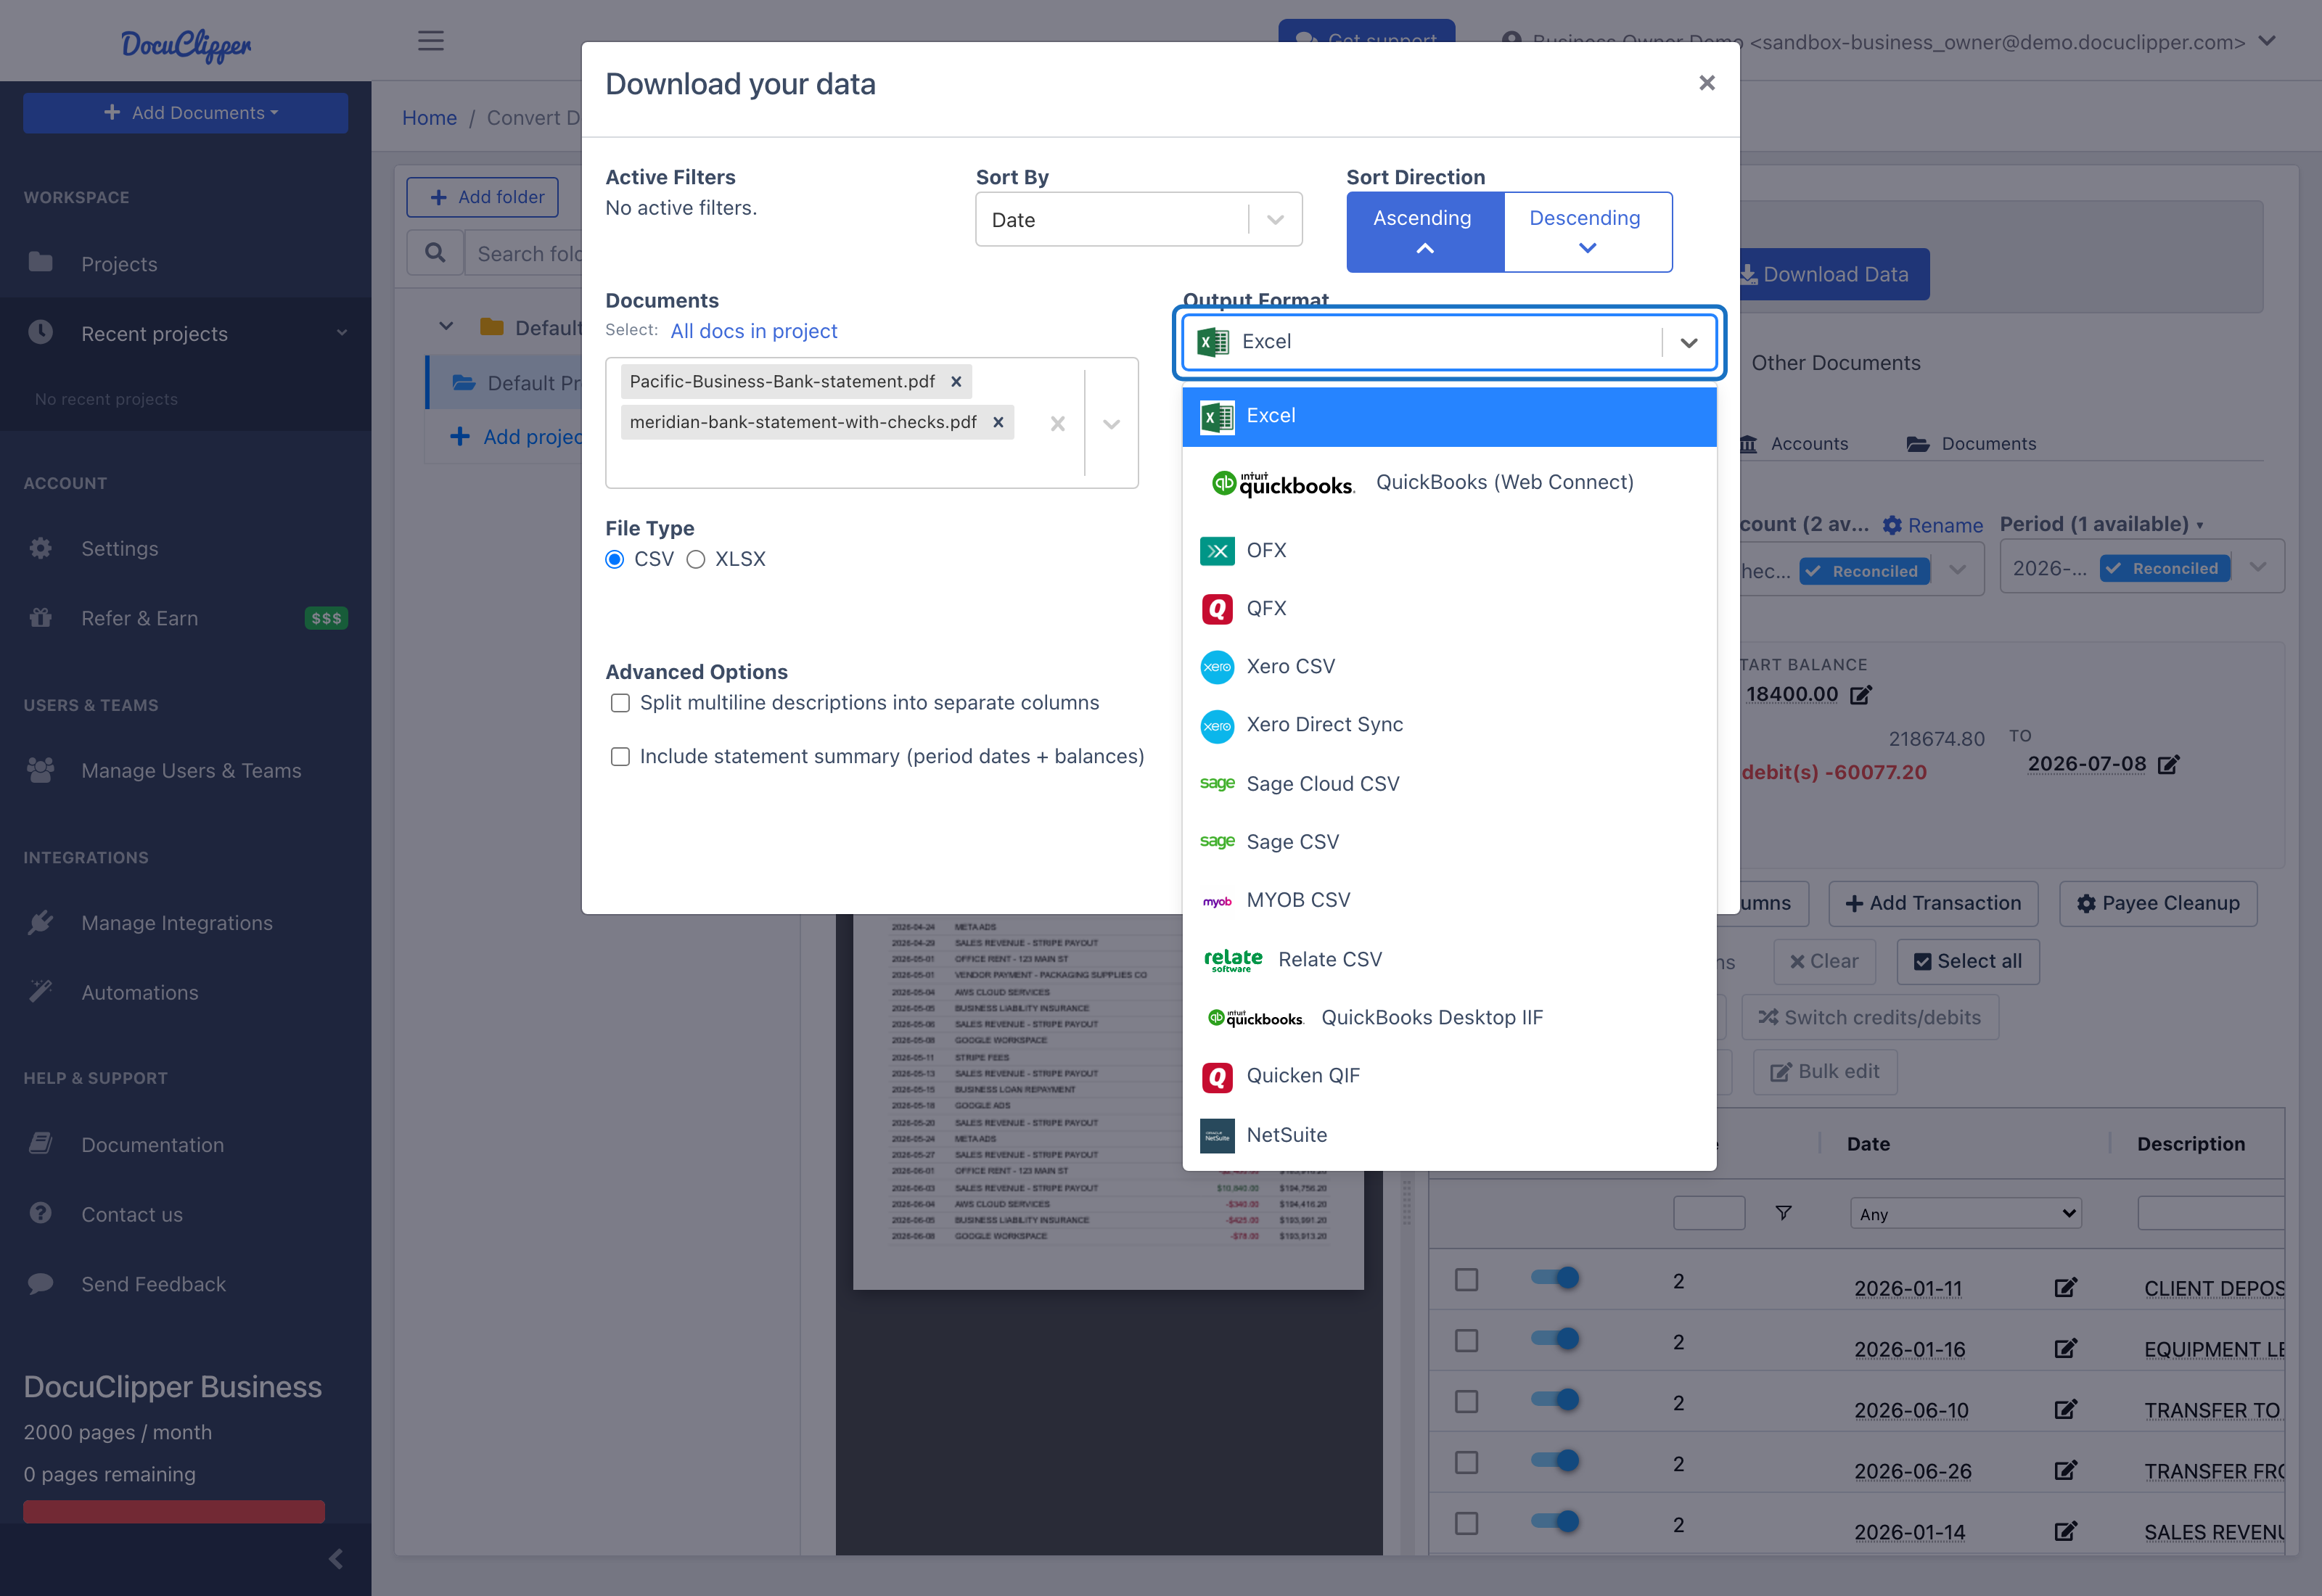
-
Fill in the account details:
Field What to enter Account type Checking / Savings for a bank account, Credit Card for a card statement. Pick the type that matches the Quicken account you import into. Routing number Shown for Checking / Savings only. Enter your bank's routing number. Account number Required, 4 to 22 characters. Enter the real account number, or at least its last four digits. Currency The currency of the statement. -
If the project contains more than one account, leave Download separate files for each account ticked so each account gets its own
.qfxfile. -
Click Download QFX (Quicken).
The dialog remembers the values you used last time in the same browser. Before each download, check that the account type and account number belong to the statement you are exporting.
Why the account number matters
Quicken uses the account number in the file to remember which Quicken account the file belongs to. Give every real account its own number. If two different accounts are downloaded with the same number, Quicken treats them as one account and links both files to the same register.
Which bank do I pick?
The QFX download does not ask for a bank. You choose where the transactions go inside Quicken during the import, by linking the file to your existing account or creating a new one.
ZIP downloads
You get a ZIP instead of a single .qfx when the project has several accounts and Download separate files for each account is ticked, or when a long statement is split into parts. Extract the ZIP and import each .qfx file on its own. Quicken cannot read the file inside the archive. See DocuClipper exports data in zip file.
Step 2: Back up your Quicken file
Before importing, use File > Backup and Restore > Backup Quicken File (Windows) or File > Save a Backup (Mac). If you link the file to the wrong account, restoring the backup is the quickest way back.
Step 3: Import into Quicken for Windows
- Open Quicken.
- Go to File > File Import > Web Connect (.QFX) File.
- Select the
.qfxfile you downloaded from DocuClipper and click Open. - In the Import Downloaded Transactions window, choose one:
- Link to an existing account, then pick the checking, savings, or credit card account the statement belongs to.
- Create a new account, if you want Quicken to make a new register for these transactions.
- Click Import.
- Open the account register and review the Downloaded Transactions tab. Accept the transactions to add them to the register.
Step 3: Import into Quicken for Mac
- Open Quicken.
- Go to File > Import > Bank or Brokerage File (OFX, QFX).
- Select the
.qfxfile you downloaded from DocuClipper and click Import. - When Quicken asks where the transactions go, choose Link to an existing account and pick the account, or create a new one.
- Review the new transactions in the account register.
The next time you import a file with the same account number, Quicken links it to the same account automatically.
Common import errors and how to fix them
"Quicken is currently unable to verify the financial institution information for this download"
Check these in order:
- The target account is connected to your bank online. Quicken will not mix a Web Connect file into an account that downloads from a bank through Direct Connect or Express Web Connect. Import into an account with online services turned off: in Quicken for Windows, open Tools > Account List, click Edit on the account, and on the Online Services tab click Deactivate. Or choose Create a new account during the import.
- Your computer's date and time are wrong. Quicken checks them during an import. Correct the system clock and import again.
- Quicken still cannot verify the bank. Open the
.qfxfile in a text editor such as Notepad or TextEdit, replace the number between<INTU.BID>and</INTU.BID>with your bank's Web Connect number from this list, save the file, and import it again. If the import then works, email support with the bank name and number so we can add it.
OL-301 errors
An OL-301 error comes from Quicken's online connection to a bank (Direct Connect), not from the file you are importing. If it appears while you import, the account you picked is set up to download from a bank directly. Deactivate online services for that account as described above, or import the QFX into a new account.
Transactions appear twice
- The same file imported twice. Every transaction in a DocuClipper QFX file carries its own transaction ID, and Quicken skips IDs it has already imported into that account. Re-importing the same file, or a fresh download of the same statements with the same settings, does not add duplicates.
- Overlapping downloads. If you download a different selection of statements (for example the same months plus a new one), the IDs change and Quicken treats the older months as new. For each import, use the Documents option in the download dialog to include only the statements that are not in Quicken yet.
- Overlap with your bank's own download. If the account also receives transactions from your bank, Quicken shows likely matches in the Downloaded Transactions tab. Accept the matched transactions, and delete the copies you do not need before accepting.
- Two accounts in one register. If transactions from another account show up, the two files were downloaded with the same account number. Re-download each account with its own account number.
Quicken will not link the file to my credit card account
The file was downloaded with Account type set to Checking / Savings, so Quicken sees a bank account. Download it again with Credit Card selected and import it into the credit card account. The same applies the other way round for a checking or savings account.
Tips
- Review in DocuClipper first. Check the reconciliation summary and fix any row in the transactions view before you download, so the import matches the statement.
- Accented letters. QFX files are plain ASCII, so DocuClipper writes accented letters as their closest plain letter (
CAFÉbecomesCAFE). Nothing is dropped. - Re-download any time. Downloads are generated on demand, so you can download the same statement as QFX again with different account details without converting it again.
FAQs
How do I import a DocuClipper QFX file into Quicken?
In DocuClipper, open Download Data, choose QFX, set the account type and account number, and click Download QFX (Quicken). In Quicken for Windows, go to File, File Import, Web Connect (.QFX) File. In Quicken for Mac, go to File, Import, Bank or Brokerage File (OFX, QFX). Then link the file to your account or create a new one.
Should I use QFX or QIF for Quicken?
Use QFX for checking, savings, and credit card accounts. Quicken does not accept QIF imports into those account types. Use QIF only for cash, asset, or liability accounts.
Which bank should I choose when downloading a QFX file?
The QFX download does not ask for a bank. You choose the account inside Quicken during the import, either by linking the file to an existing account or by creating a new one.
Why does Quicken put two different accounts in the same register?
Both files were downloaded with the same account number. Quicken links a file to an account by that number, so give each real account its own number in the download dialog.
How do I fix "unable to verify the financial institution information" in Quicken?
Import into an account that is not connected to a bank online, or let Quicken create a new account. Check that your computer's date is correct. If it still fails, replace the INTU.BID value in the file with your bank's Web Connect number and import again.
Will importing the same QFX file twice create duplicates?
No. Each transaction has its own ID and Quicken skips IDs it has already imported into that account. Duplicates come from importing a different selection of statements that overlaps months already in Quicken.
Can I import an OFX file into Quicken instead?
Use QFX for Quicken. Quicken's Web Connect import expects the Quicken bank identification that a QFX file carries. OFX is for Sage, MYOB, and other tools that read plain OFX.
Related
- Downloading Bank Transactions
- Import into Quicken (QIF)
- DocuClipper exports data in zip file
- Unable to Verify Financial Institution
- PDF to OFX and QFX Converter
If you run into issues, email support@docuclipper.com.