Overview #
Invoice to Purchase Order (PO) matching helps you connect invoices with their corresponding purchase orders, creating a complete audit trail for your procurement process. This feature streamlines accounts payable workflows and ensures accurate financial tracking.
What is Invoice to PO Matching? #
Invoice to PO matching allows you to:
- Link invoices to purchase orders – Create connections between received invoices and original purchase orders
- Track procurement cycles – Follow the complete process from PO creation to invoice payment
- Improve accuracy – Reduce errors by verifying invoice details against original purchase orders
- Enhance reporting – Track the relationship between POs and invoices
Key Benefits #
- Three-way matching – Compare purchase orders, invoices, and receipts
- Prevent duplicate payments – Identify if an invoice has already been processed
- Budget tracking – Monitor spending against original purchase authorizations
- Complete audit trail – Maintain records of all matches and their approval status
- Workflow efficiency – Process multiple matches simultaneously with status tracking
How to Use Invoice to PO Matching #
Accessing the Feature #
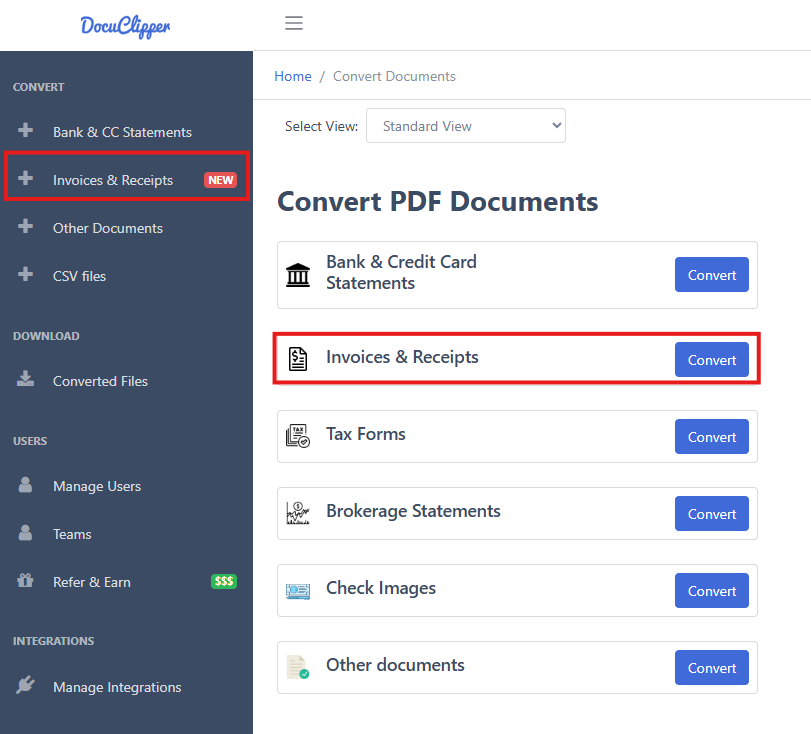
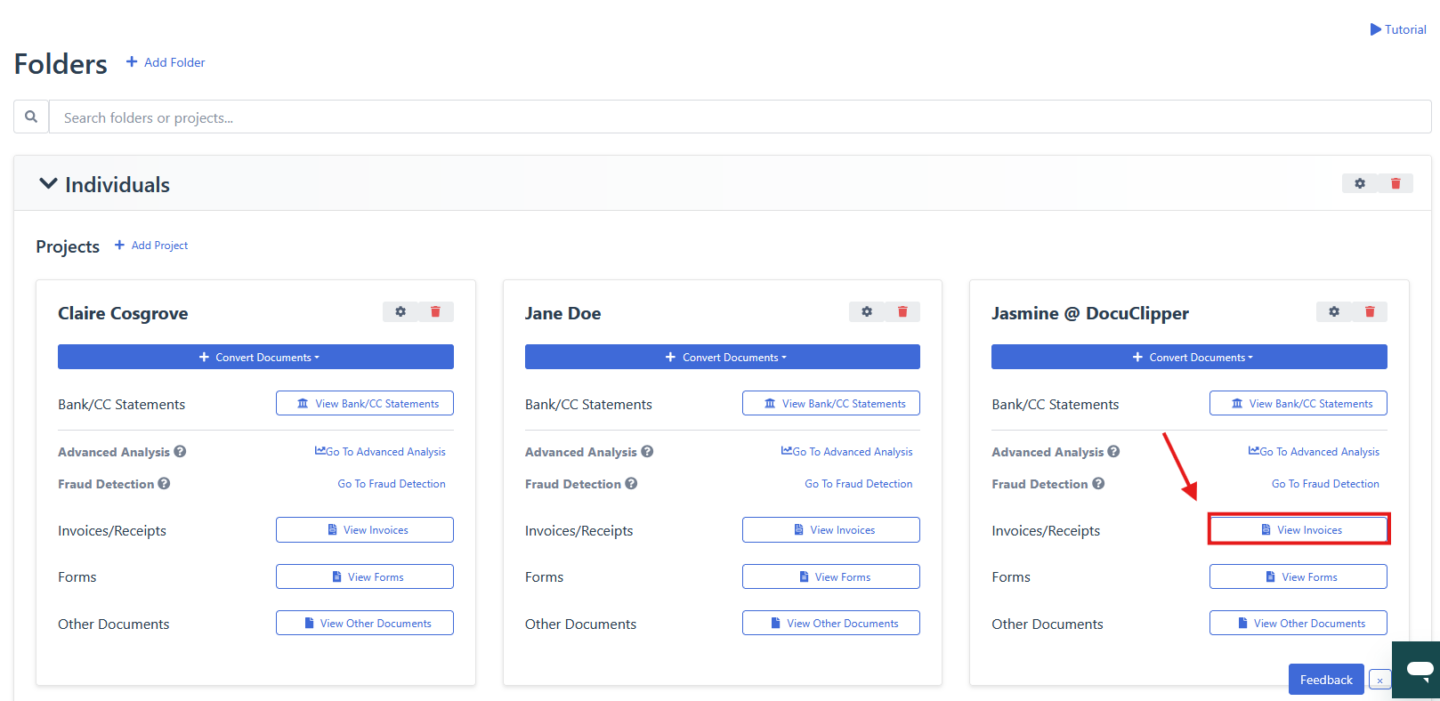
- Navigate to your invoice – Go to the Invoices section and select an invoice
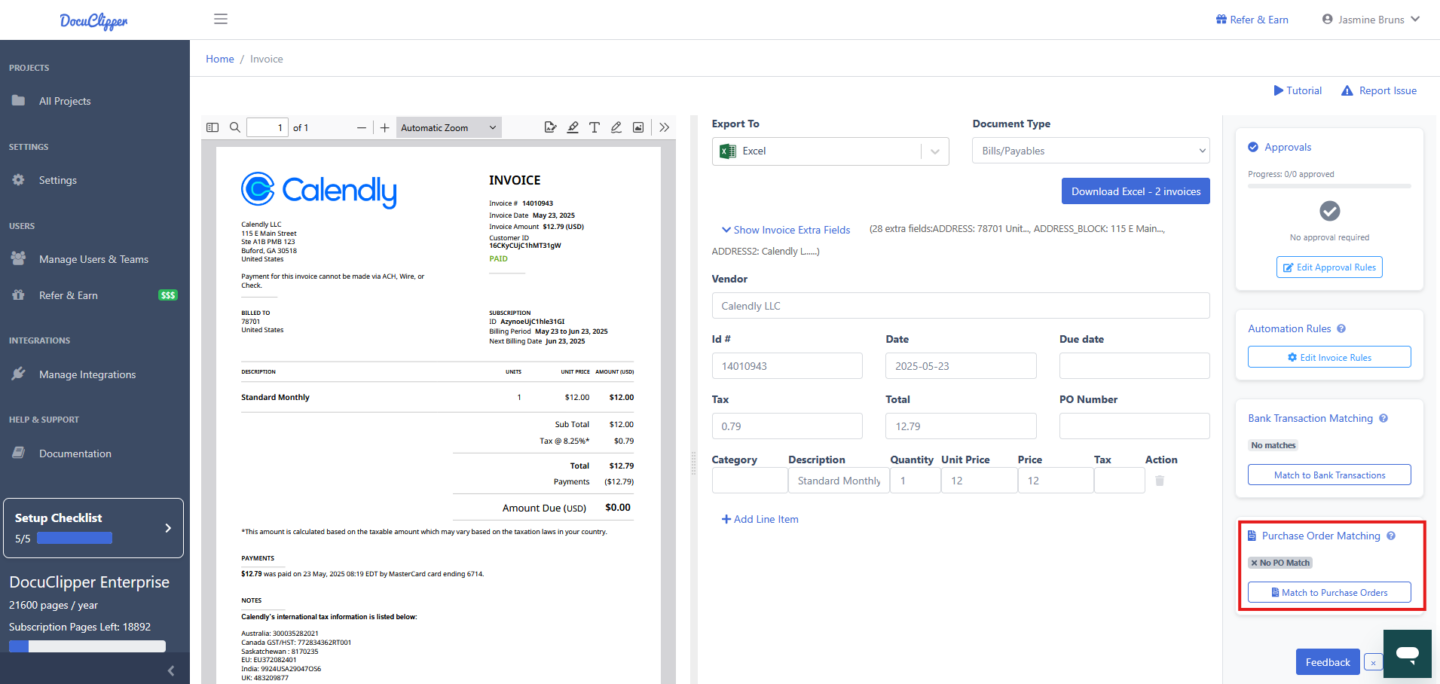
- Open the matching panel – Click the “Match to PO” button or icon
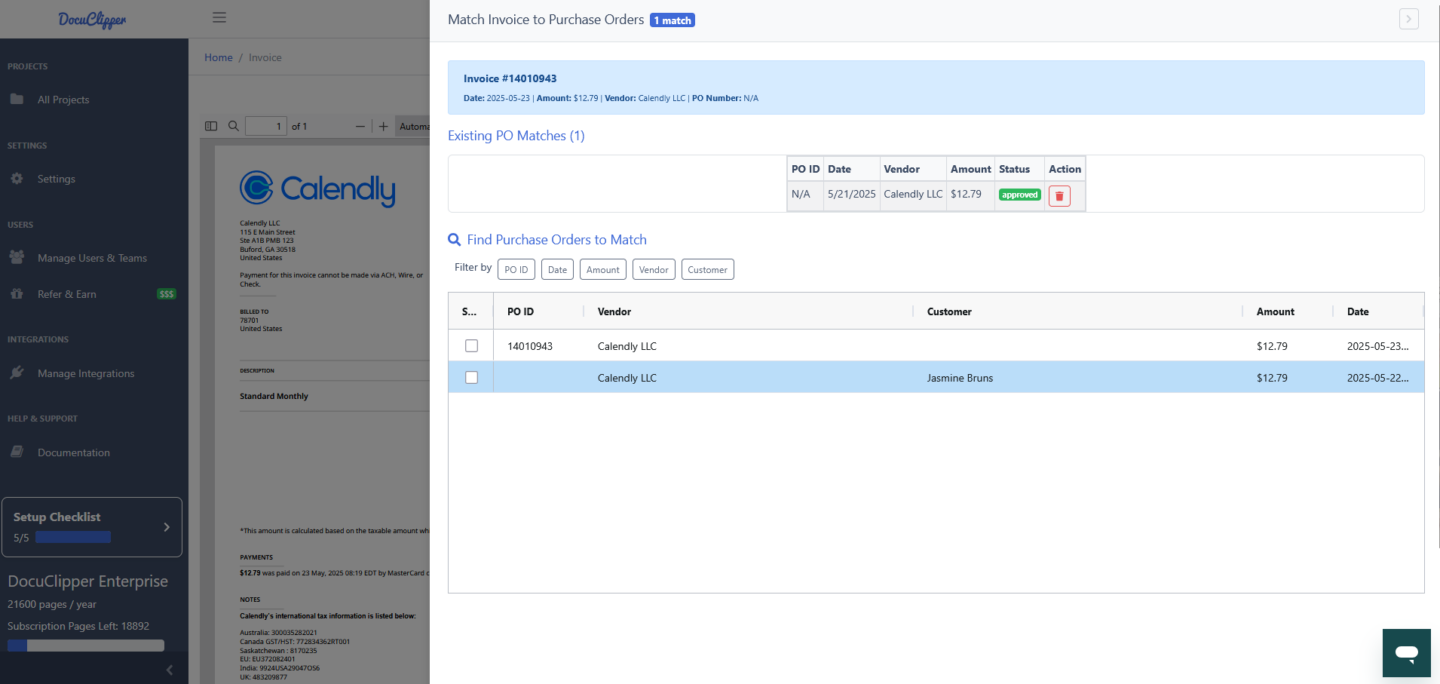
- Review invoice details – The system displays current invoice information including invoice number, date, amount, vendor/customer, and PO number
Viewing Existing Matches #
The system automatically displays any existing PO matches showing:
- PO ID – The purchase order identifier
- Date – Purchase order date
- Vendor/Customer – Associated party information
- Amount – Purchase order amount
- Status – Current approval status (approved, pending, rejected)
You can delete incorrect matches using the trash icon or update approval status as needed.
Creating New Matches #
Step 1: Search for Purchase Orders #
Use filters to find relevant purchase orders:
- PO ID – Search by specific purchase order number
- Date Range – Filter by purchase order date
- Amount – Find POs with specific amounts
- Vendor/Customer – Filter by vendor or customer name
Step 2: Select and Create Matches #
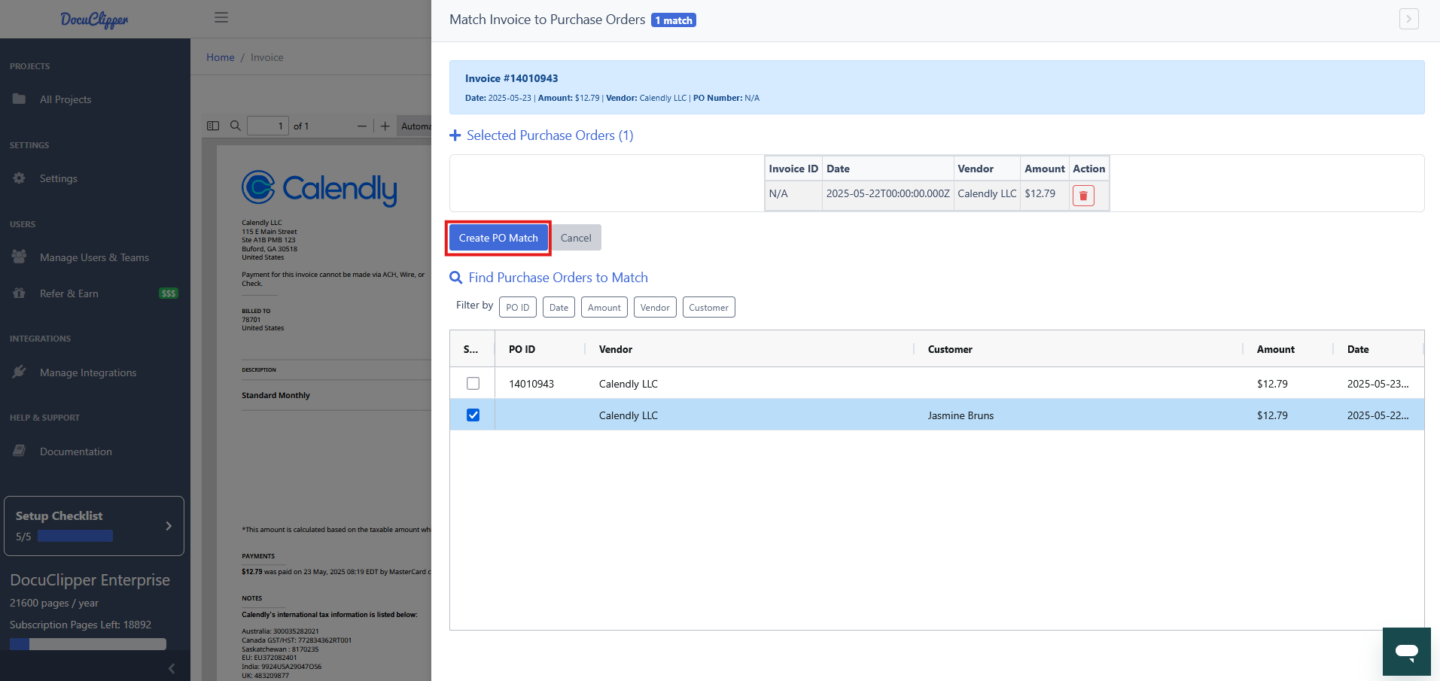
- Review results – The system displays matching purchase orders in a table
- Select matches – Use checkboxes to select relevant purchase orders
- Create match – Click “Create PO Match” to establish the connection
- Confirmation – The system confirms successful matching and updates the display
Match Status Types #
- Approved – Match verified and approved (green badge)
- Pending – Match awaiting review or approval (yellow badge)
- Rejected – Match declined (red badge)
Best Practices #
Matching Accuracy #
- Verify amounts – Ensure invoice amounts align with purchase order totals
- Check dates – Confirm invoice dates are reasonable compared to PO dates
- Validate vendors – Ensure vendor information matches between documents
Workflow Management #
- Regular reviews – Periodically review pending matches
- Batch processing – Process multiple matches together for efficiency
- Document discrepancies – Note any differences between POs and invoices
Troubleshooting Common Issues #
No Matching Purchase Orders Found #
Solutions:
- Expand search criteria (date ranges, amount ranges)
- Try partial vendor name matches
- Check for alternate vendor name spellings
- Contact procurement team to verify PO status
Amount Discrepancies #
Common reasons: Partial deliveries, price adjustments, tax differences, shipping costsSolutions: Document the discrepancy, verify with vendor if needed, consider partial matching
Reporting and Analytics #
Available Views and Filters #
The invoice management system provides basic reporting through filtered table views:
- Invoice ID – Search by specific invoice numbers
- Date Range – Filter invoices by document date
- Amount – Filter by invoice amount ranges
- Type – Filter by receivables/payables
- Vendor/Customer – Search by vendor or customer names
- Approval Status – View pending or approved invoices
- PO Match Status – See which invoices have PO matches (Yes/No)
- Bank Match Status – See which invoices have bank matches (Yes/No)
Basic Reporting Workflow #
- Access the invoice table – Navigate to the main invoices view
- Apply filters – Use the “Filter by” options to narrow results
- Review status – Check PO and bank match columns for completion status
- Export data – Use the “Download Invoices” button to export filtered results
- Take action – Click “View Invoice” to access detailed matching tools
Common Report Scenarios #
- Unmatched Invoices: Filter “Has PO Match” to “No” to find invoices needing PO matches
- Pending Approvals: Filter “Approval Status” to “Pending” to see invoices awaiting approval
- Vendor Analysis: Filter by specific vendors to review their invoices
- Date-based Reviews: Filter by date ranges for period-specific reviews
Getting Started #
- Setup – Ensure your purchase orders are properly entered in the system
- Training – Familiarize your team with the matching interface
- Process – Establish clear workflows for match approval
- Monitor – Regularly review match quality and success rates
Support and Resources #
For additional assistance with invoice to PO matching:
- Email Support – Contact support@docuclipper.com
- System Administrator – Reach out to your system administrator
- Internal Resources – Review your organization’s procurement policies and consult with the accounts payable team
This feature is designed to make your procurement and accounts payable processes more efficient and accurate. Regular use of invoice to PO matching will improve your financial controls and provide better visibility into your organization’s spending patterns.


