At times, you may notice that the year displayed in your DocuClipper account is incorrect. This could be due to a variety of reasons, but it’s usually a simple fix. This article will guide you through the process of correcting the year in DocuClipper.
Steps:
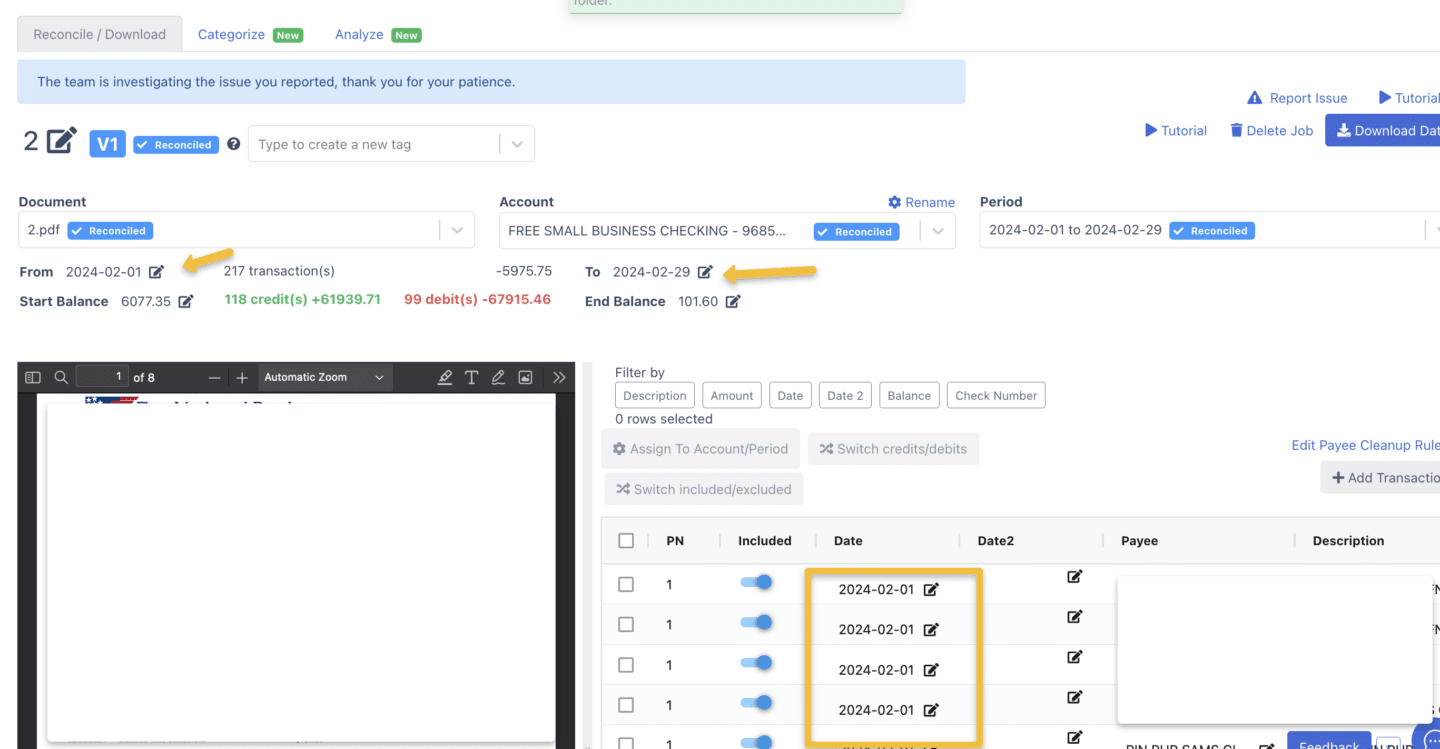
- Identify the Issue: The first step in resolving this issue is to identify where the incorrect year is being displayed. This is found in the summary table, under the column “Date.”
- Toggle for Multiple Accounts/Periods (if applicable): If you’ve uploaded multiple documents that include different accounts or reporting periods, you will need to toggle between each account/period using the selector at the top. This ensures you’re reviewing and correcting the dates for each individual set of data.
- Edit the Dates: Once the issue is identified, correct the year by either: Editing the start and end dates in the summary table of the specific transaction, or Editing the date range shown at the top of the screen. To do this, click the edit icon, delete the incorrect year, and type in the correct one.
- Save Changes: After making the necessary edits, be sure to save your changes. This will update the year across your DocuClipper account accordingly.
Conclusion #
Correcting the year in DocuClipper is a straightforward process that can be done in a few simple steps. If you have any further questions or need additional assistance, please don’t hesitate to reach out to our support team.


