Downloading Transactions as an IIF File #
🎥 Watch the Tutorial: Importing DocuClipper Data into QuickBooks Desktop #
- Log in to DocuClipper: Access your account by entering your credentials.
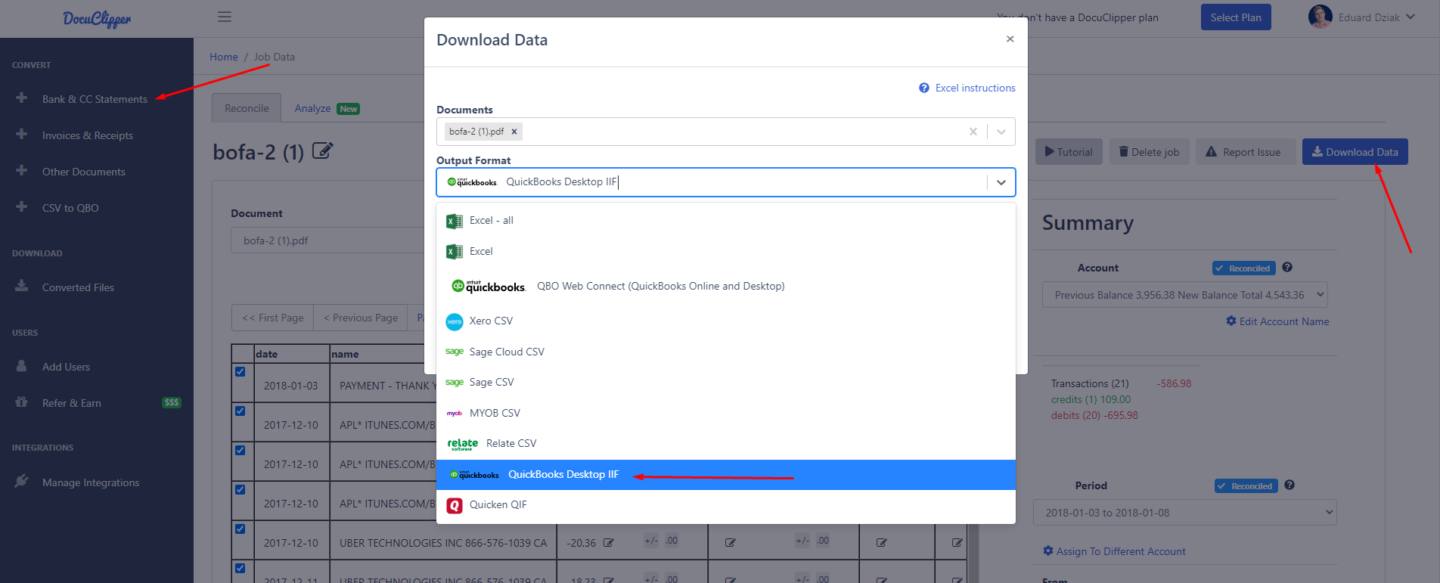
- Navigate to Data Extraction: Click on “Bank & Credit Card Statements” located in the left sidebar at the top under “Convert” or within the dashboard main page.
- Upload Your Scanned or PDF Bank Statements: Drag and drop one or more PDFs or scans of your bank statements.
- Categorize Transactions:
- Choose a category group.
- If you’re using QuickBooks Desktop, we recommend creating a new category group that includes custom categories linked to your QuickBooks vendor names or chart of accounts.
- Each category name must exactly match the corresponding expense or income account name in QuickBooks Desktop, character for character.
- This ensures accurate transaction mapping during import.
- Preview and Review Categorization:
- Verify that each transaction has been categorized correctly under your newly created QuickBooks Desktop-compatible category group.
- This step helps prevent errors and mismatches during import.
- Download IIF File: Once the data extraction and categorization are complete, click on the “Download Data” button on the right side, above the Summary of Reconciliation.
- Select Output Format: In the Output Format dropdown, select “QuickBooks Desktop IIF”.
- Enter Details: Complete the required information within the “Source Account” and the “Destination Account” fields.
Source Account:- Required field
- Enter the name of the account from which the transaction originates
- The account name must match exactly with an account name in your QuickBooks setup
- Example: “Checking Account”, “Savings Account”
- Option 1: Use Category as Destination Account (Recommended)
- This is the default option
- Uses the transaction’s category as the destination account
- Category names must match exactly with account names in QuickBooks
- Best for consistent account mapping across transactions
- Option 2: Use Custom Destination Account
- Manually specify a destination account for the transaction
- The account name must match exactly with an account name in QuickBooks
- Use this when you need to override the category-based destination account
Important: All account names (both source and destination) must match your QuickBooks account names exactly, including spaces and capitalization.
- Finalize Download: Click on “Download IIF”.

Importing the IIF File into QuickBooks Desktop #
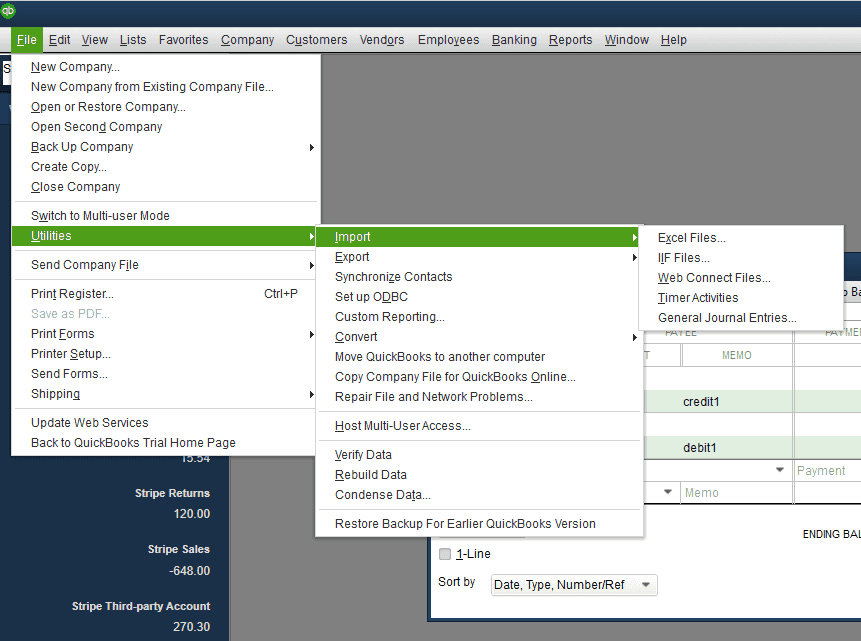
After obtaining the IIF file, follow these steps to import the transactions into QuickBooks Desktop:- Navigate to Import Option: Click on “File > Utilities > Import > IIF files” in QuickBooks Desktop.


