Extract Data From Bank Statements
Convert PDF bank and credit card statements into structured transaction data you can review, reconcile, and export.
Last updated
To extract data from a bank statement in DocuClipper, click Add Documents → Bank/CC Statements (PDF), drag in your PDFs, click Convert, then review the reconciled transactions and click Download Data to export to Excel, CSV, QBO, IIF, Xero, Sage, or QIF.
The full flow is four steps: upload, convert, reconcile, and download. A typical statement processes in well under a minute.
How do I extract transactions from a PDF bank statement?
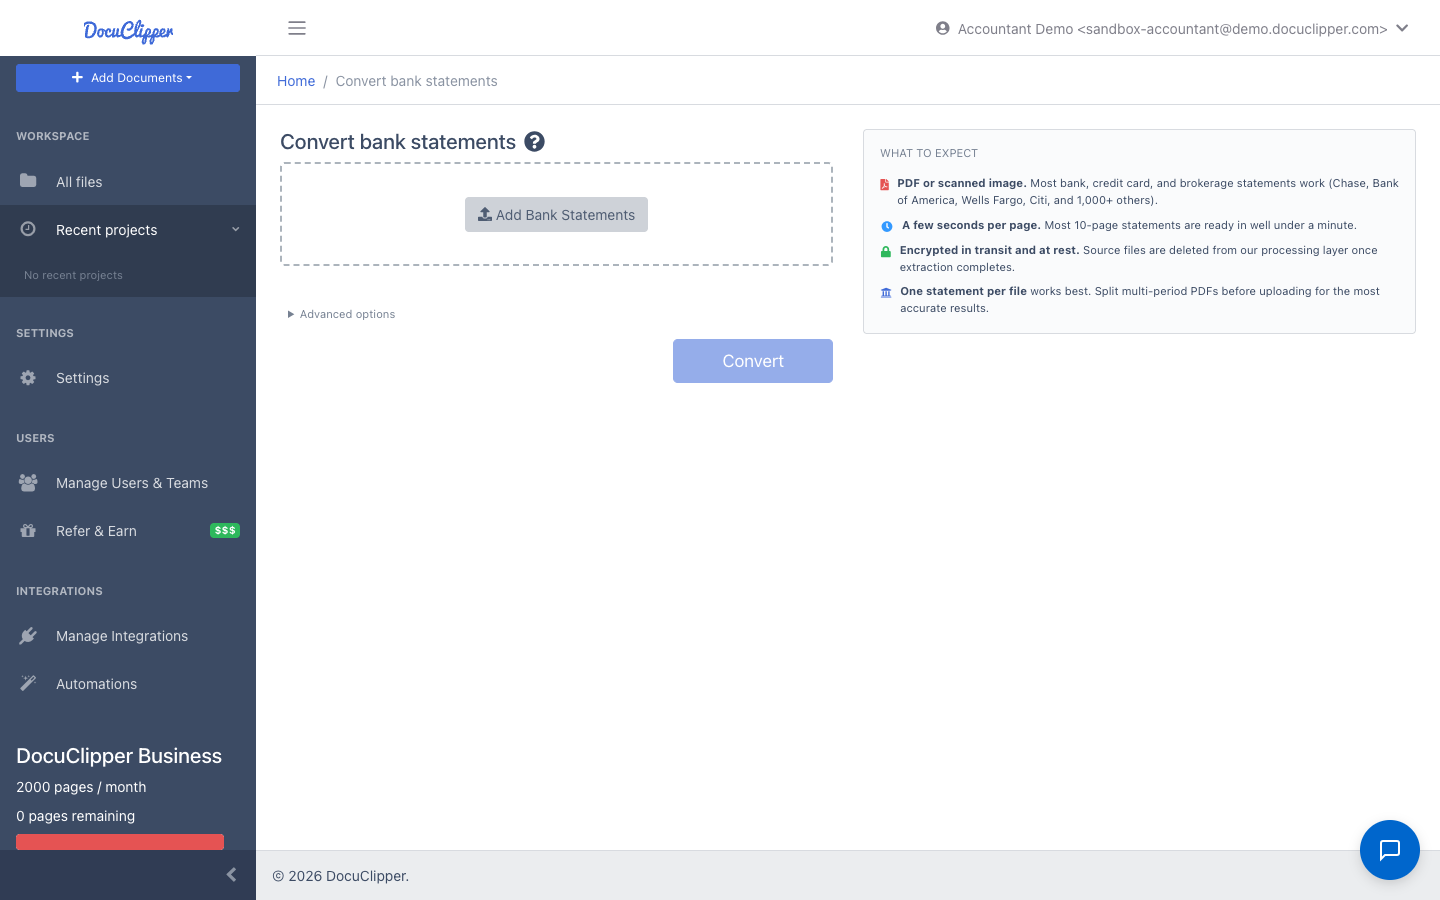
Step 1: Open the bank statements converter
From the left sidebar, click Add Documents and pick Bank/CC Statements (PDF) from the dropdown.

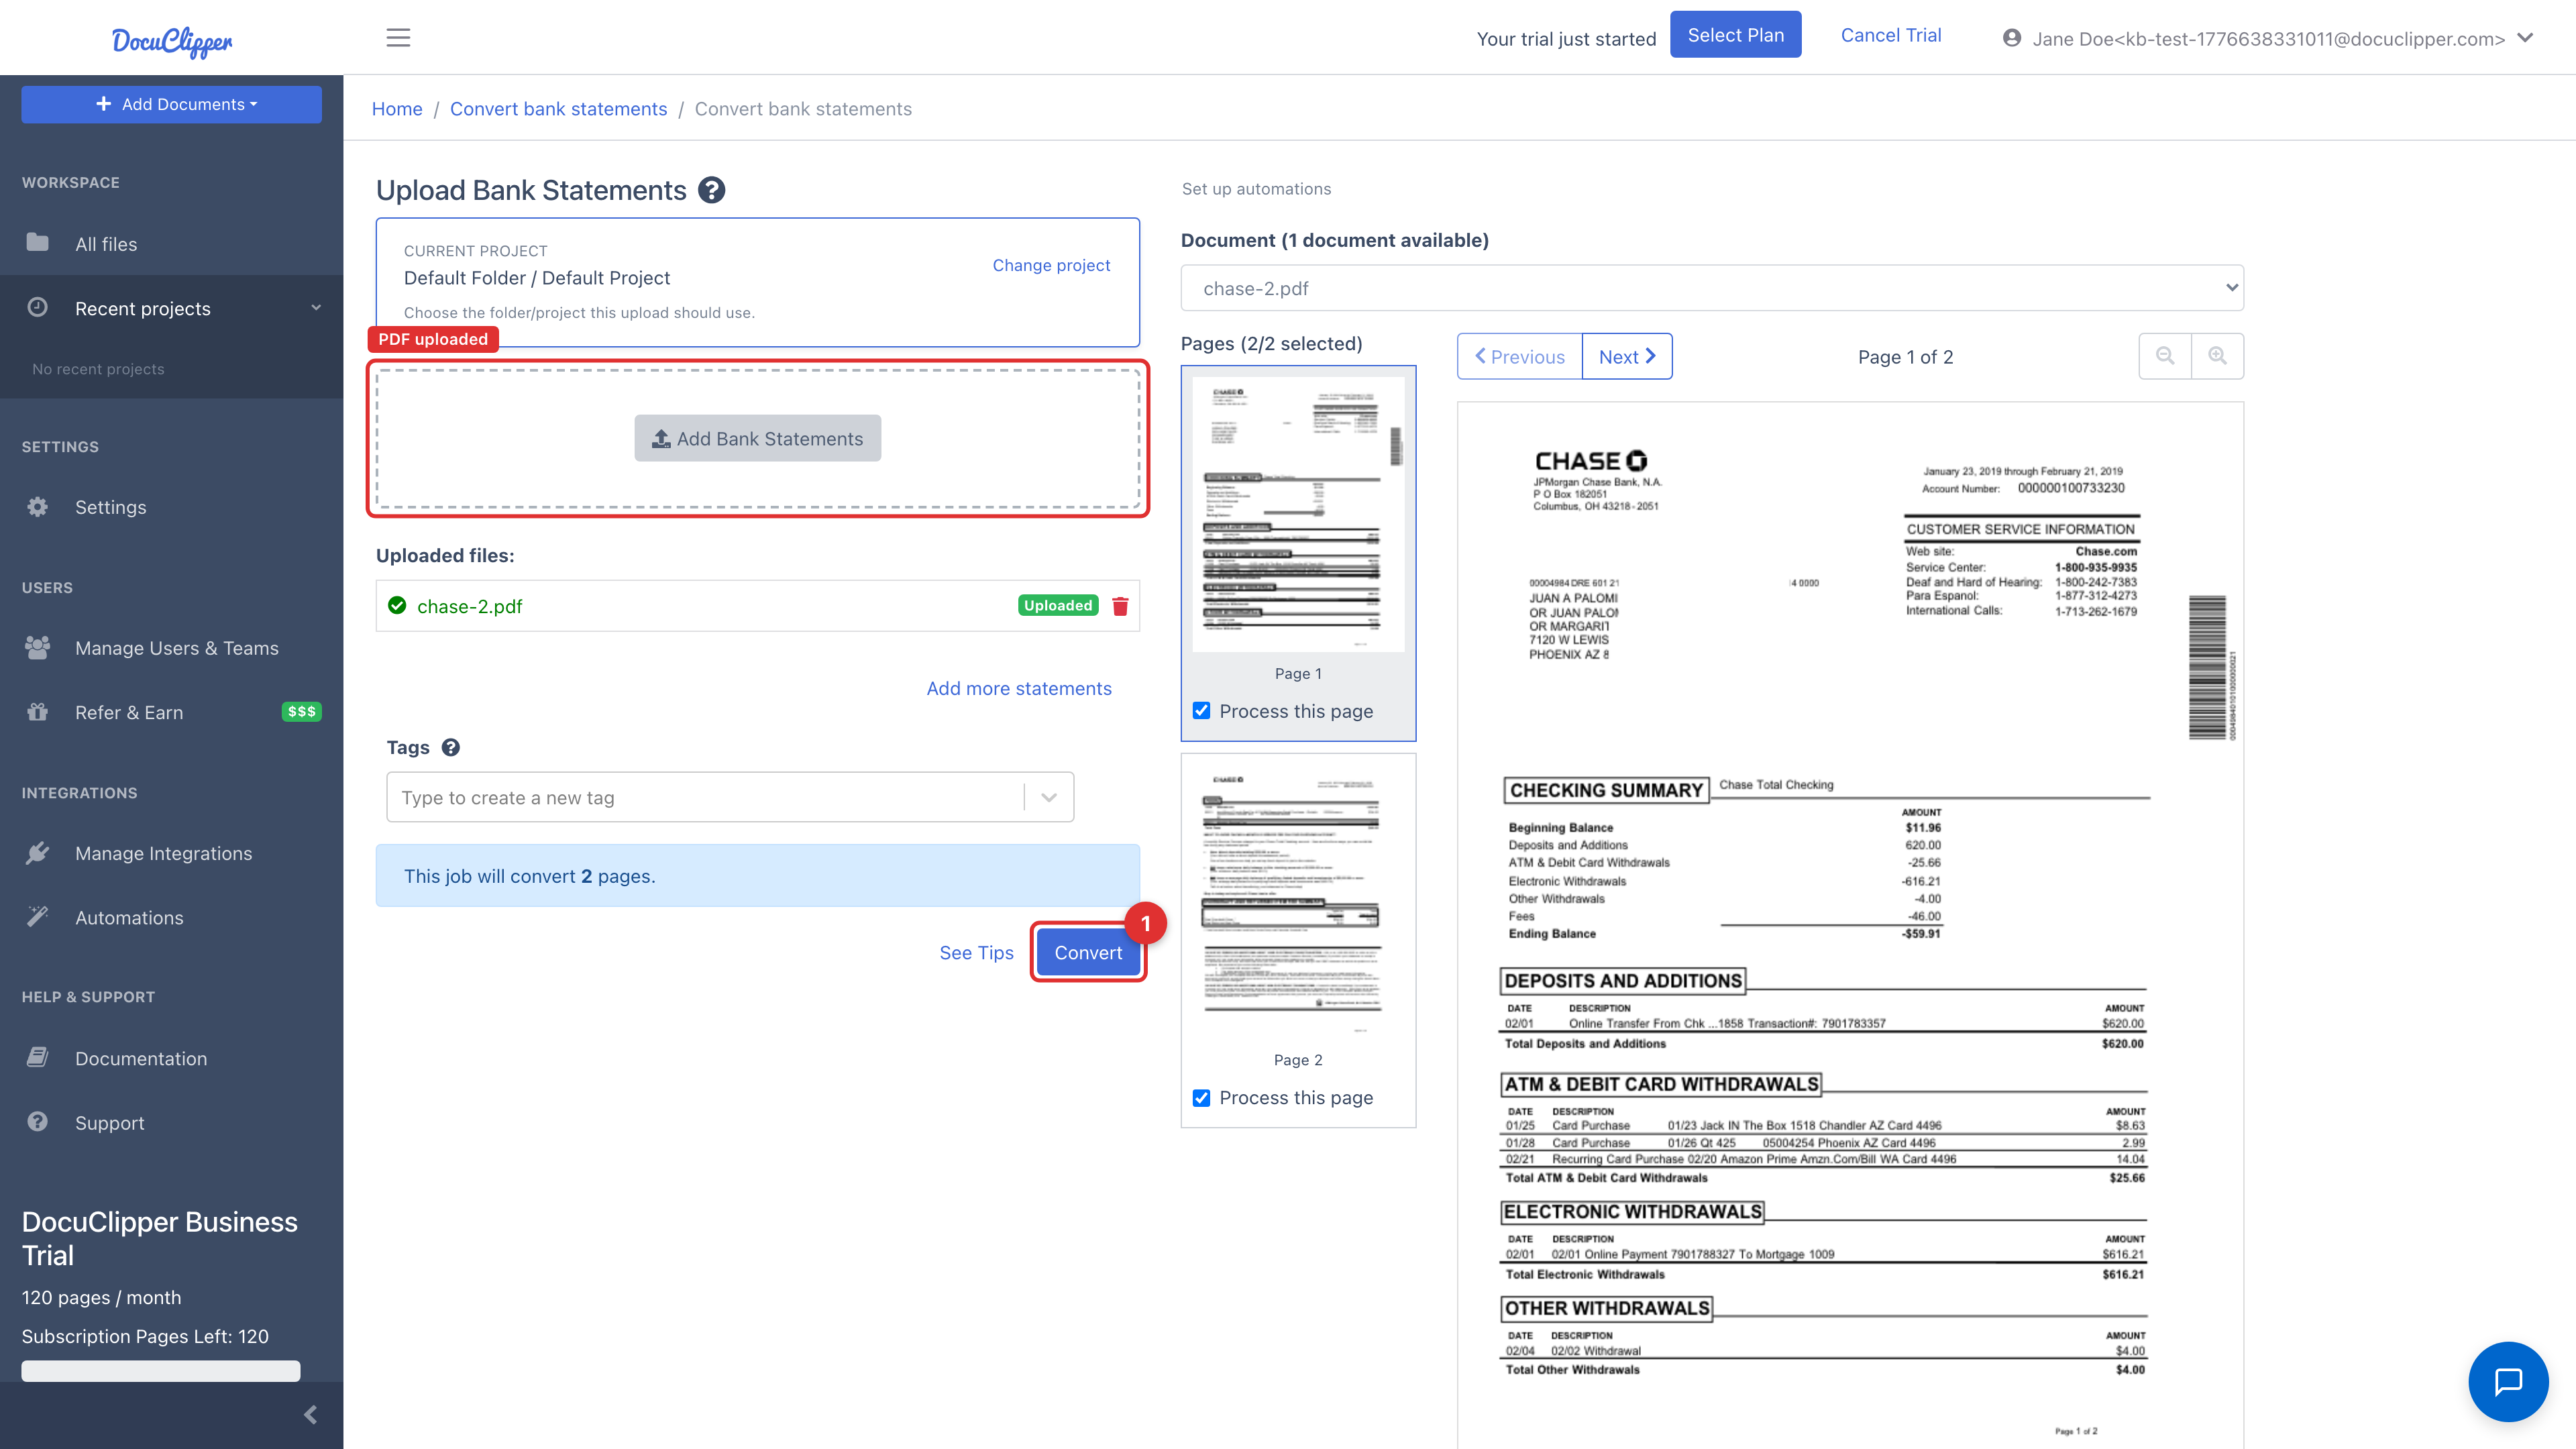
Step 2: Upload your PDFs
Drag PDF statements into the upload area, or click Add Bank Statements to browse for files.
For the best results:
- Do not pre-OCR the PDF, DocuClipper's OCR is tuned for raw scans.
- Keep each statement period in its own PDF. Do not merge multiple months into one file.
- Preserve the original page order; don't remove or reshuffle pages.
- For scanned statements, make sure the pages are upright and legible.
Once your files are loaded you'll see them listed under Uploaded Files, and the page count at the bottom tells you how many pages will be converted.
Step 3: Convert
Click Convert to start extraction.
DocuClipper processes statements in the background. A typical statement takes well under a minute.
Step 4: Review & reconcile
When conversion finishes, you land on the Transactions view inside the default project.
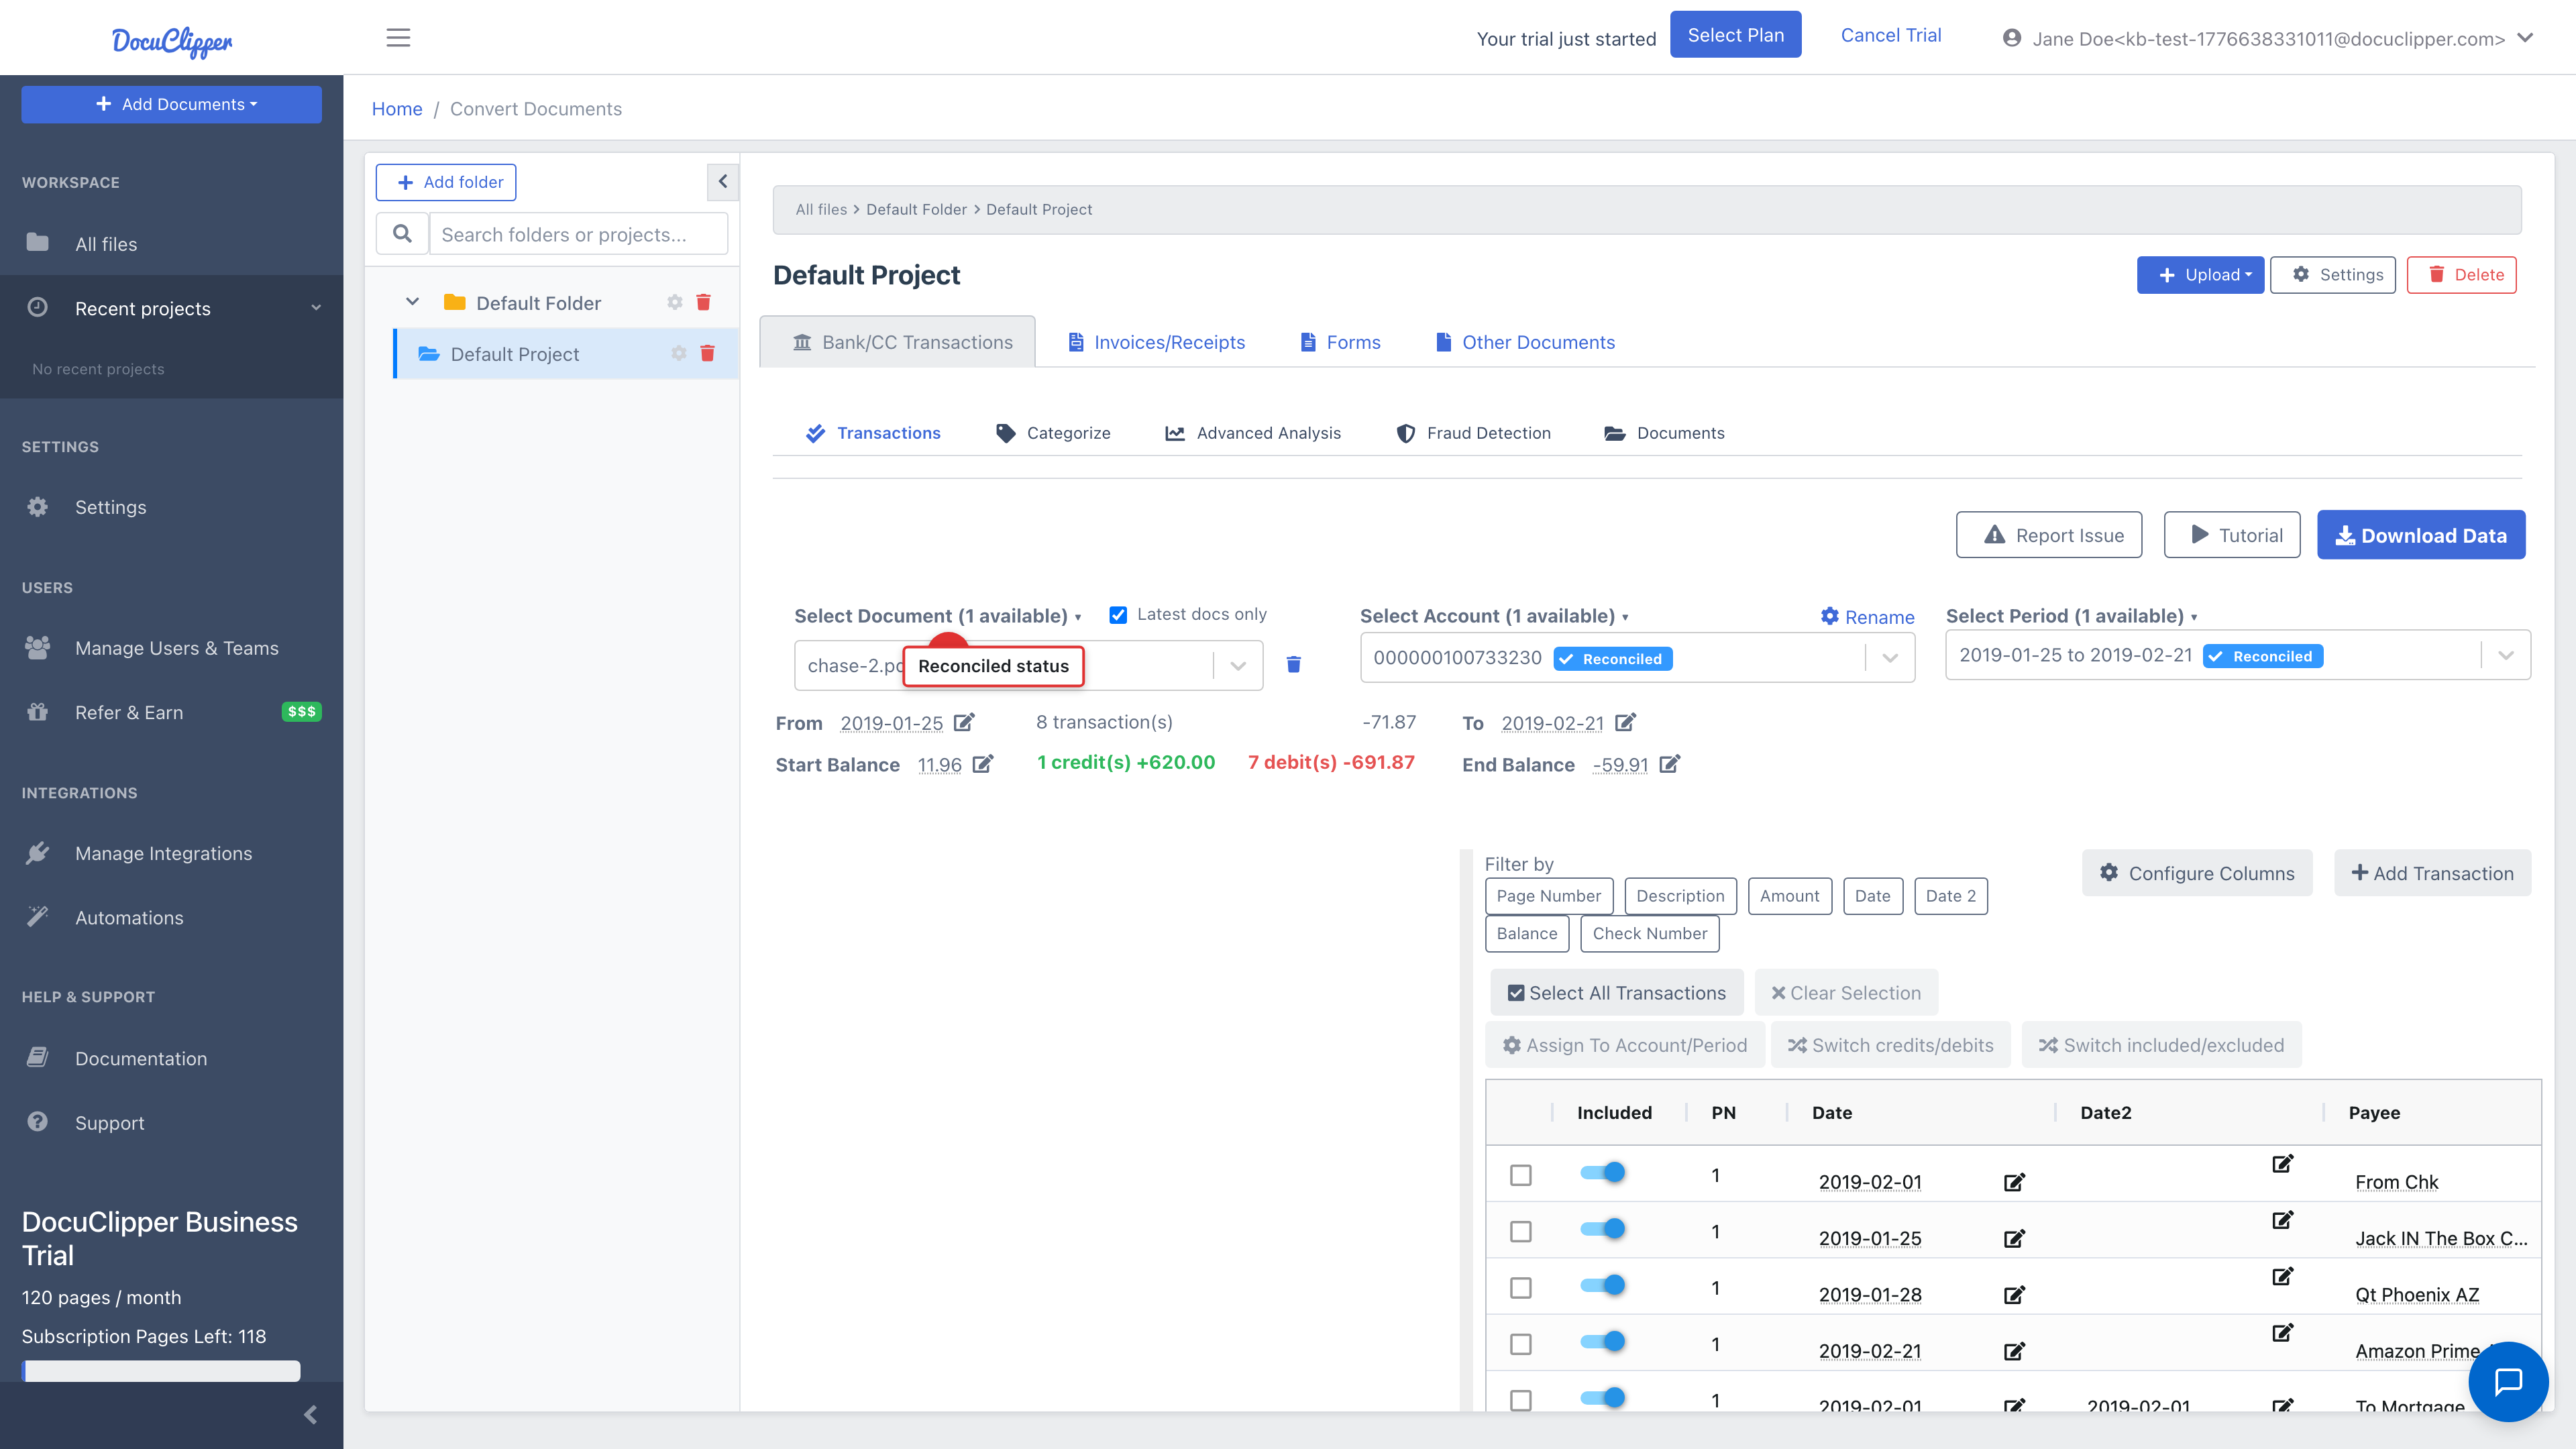
From here you can:
- Switch between uploaded statements with the Select Document dropdown.
- See Start Balance, End Balance, Total Credits, and Total Debits for the selected statement. When these match the statement PDF, DocuClipper marks it Reconciled (green badge).
- Edit individual transactions, exclude rows, or add missing ones.
- Filter by description, amount, or date.
If a statement isn't reconciling, see how reconciliation works and fixing missing or wrong transactions.
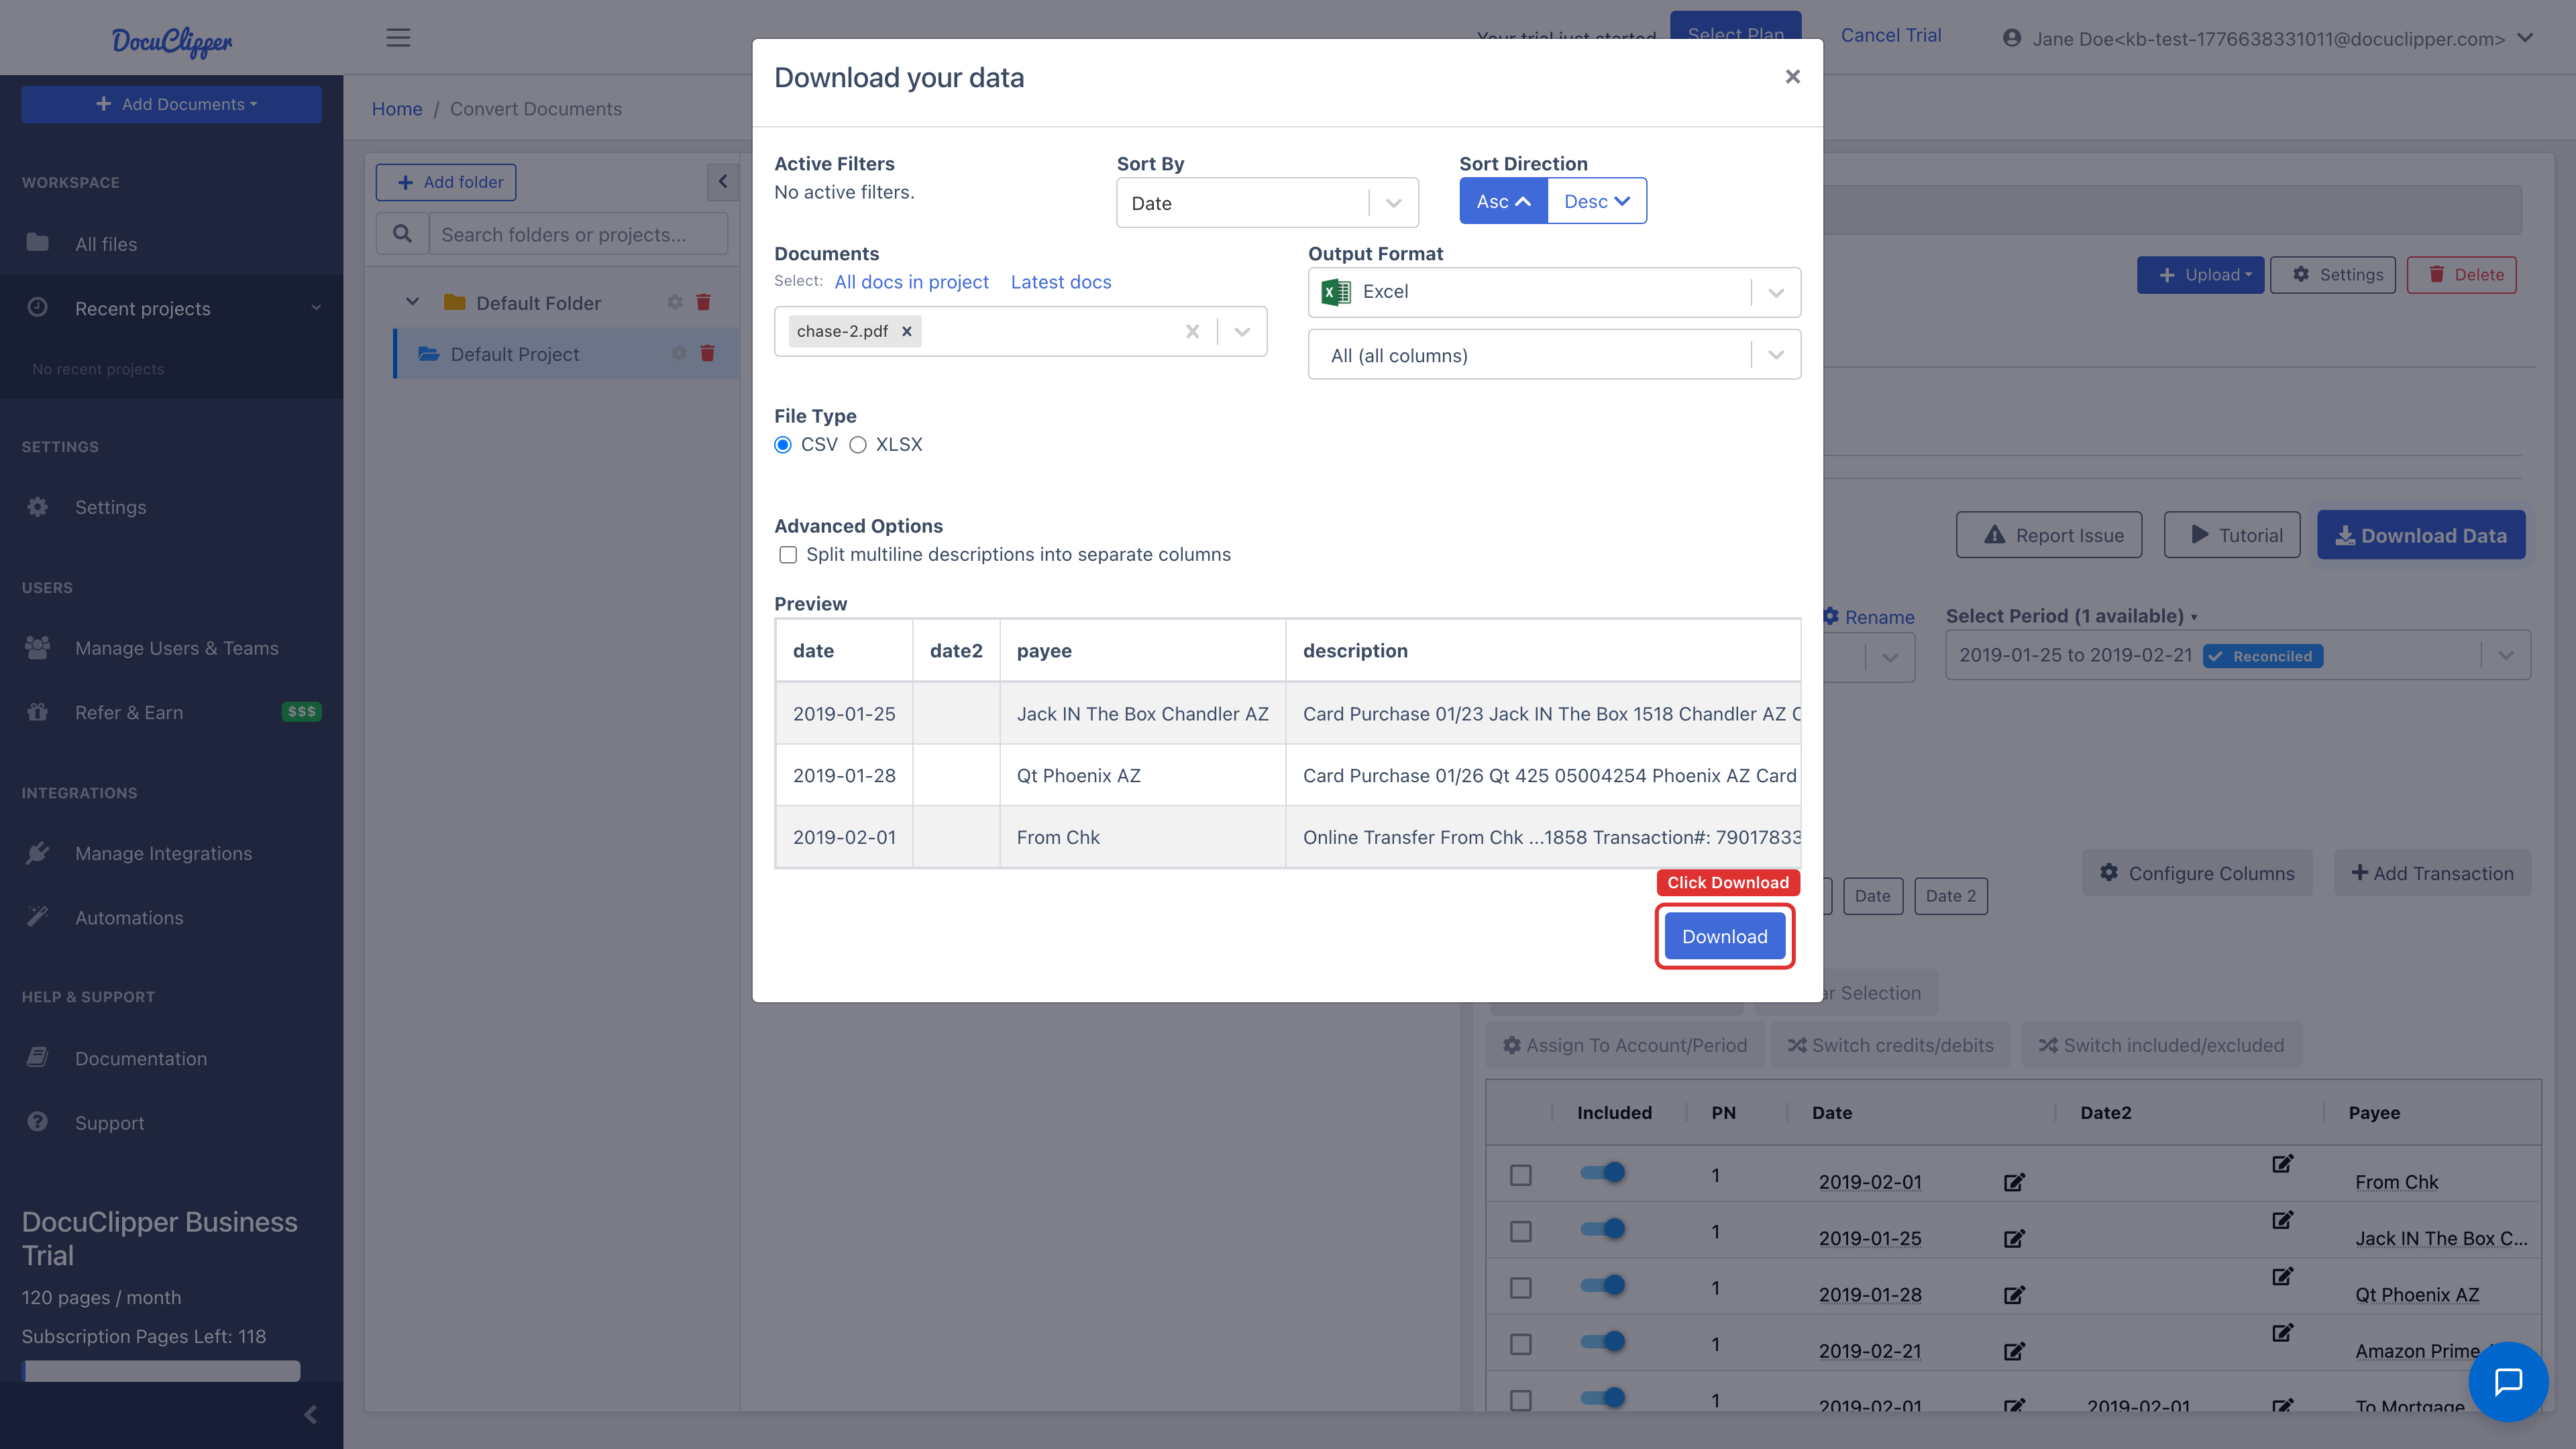
Step 5: Download your data
Click Download Data (top right of the transactions view) to open the export dialog.

Pick an Output Format (Excel, CSV, QBO, QIF, or IIF), choose which statements and columns to include, then click Download.
For a deeper walkthrough of export options, see downloading bank transactions. To send transactions directly to QuickBooks Online, follow import bank statement transactions into QuickBooks Online.
Having trouble?
- Debits/credits look reversed? See debits and credits being backward.
- Statement won't reconcile? See how to fix 'Not Reconciled' statements.
- Other problems? Email support@docuclipper.com.
FAQs
How do I extract data from a PDF bank statement?
Click Add Documents in the left sidebar, choose Bank/CC Statements (PDF), drag your PDFs into the upload area, and click Convert. The extracted transactions appear in the Transactions view ready to review and export.
Should I pre-OCR my PDF before uploading?
No. DocuClipper's OCR is tuned for raw scans, so pre-OCR'd files can actually produce worse results. Upload the original PDF as-is.
Can I merge multiple monthly statements into one PDF?
No. Keep each statement period in its own PDF so DocuClipper can read the start and end balances correctly. Also preserve the original page order.
How long does conversion take?
A typical statement takes well under a minute. Processing runs in the background, so you can upload several files at once.
What does the green Reconciled badge mean?
It means the start balance, end balance, total credits, and total debits all match the source PDF. If the badge is red, the totals do not agree and you need to fix or add transactions before exporting.
Which output formats are supported?
Excel, CSV, QBO Web Connect, QuickBooks Desktop IIF, and Quicken QIF, among others. Pick the format from the Output Format dropdown in the Download Data dialog.